Bottom Line up Front
At a price of approximately $499, the Robo R1+ definitely delivers. It’s easy to use, really accurate and provides a sturdy machine for beginners.
Our Pros: An automated leveling print platform, an aesthetically pleasing device and free Autodesk Fusion 360 subscription means you have a printing device which is hooked up to the cloud just for your use.
Our Cons: The Robo R1+ produces a fair amount of heat which can be troubling if you work in a space with limited ventilation.
Our Bottom Line: the Robo R1+ checks most of the right boxes when considering a desktop 3D printer under $500. The printing device definitely delivers as advertised by its producers.
Stop reading here and Buy the Robo R1+ Now!
Beauty and Function
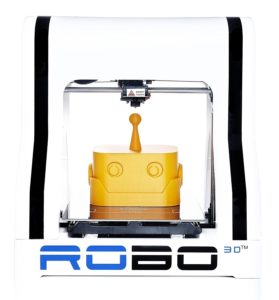
Beauty they say, is in the eyes of the beholder but in the case of the Robo R1 Plus, this time-tested mantra holds no water. Lay eyes on this 3D printer and be drawn in by its beauty. In this review, we will be taking a look at the nuts and bolts that make the aesthetically pleasing Robo R1+ tick and prove to you this machine is more than just pretty. So stay tuned.
With this 3D printer, Robo—its parent company—pulled all the stops to ensure that the R1 plus debuted at the top of the market available for desktop 3D printers. And before moving to explore its unique features, I believe it is quite important you know the demographics for which the Robo R1+ was developed. The R1+ was designed to give beginners to 3D printing and hobbyists, a relatively large printing space to hone his or her developing 3D printing skills with ease. Not only is this machine good for a beginner, but it is more than capable of performing just as well as other more, complicated, 3D printers. Read on as we review the Robo R1+ while using the detailed standards covered in our 3D printing buyer’s guide.
Unboxing the Robo R1+
The first step to getting acquainted with the Robo R1+ is opening the package and digging into the different components that it contains. Its package contains the following items:
- The Robo R1+
- Power cable
- USB cable
- Spool Holder
- SD card
- PLA filament
- Spatula
- User manual and a toolbox
The Robo R1+ comes fully assembled meaning you don’t have to go through any assembly steps. This isn’t a piece of IKEA furniture here, it’s a fully functioning 3D printer. The package also comes equipped with a few of the major tools—tweezers, screwdriver, lubricant etc.—that a beginner will need.
Pro-Tip: Do not forget to screw the rubber feet onto the 3D printer to achieve a much-needed buffer between the R1+ and your work table, and to provide a firm, non-slip base.
The Robo R1+ Features
Many beginner desktop 3D printers are DIY to keep the price down and require significant assembly. While this can be a good way to learn about your machine if you aren’t mechanically and electrically inclined you are likely to be deterred. The Robo R1+ is a machine built with starting quickly in mind and in this, the Robo R1+ does not disappoint. A motivated beginner could go from unboxing to installing a printing software, and actually beginning a project in under 10 minutes. Yes, this is a ridiculous idea and completely unnecessary, but it indicates how easy it is to get started with this 3D printer.
The R1+ works with the popular Fused Filament Fabrication technique—FFF—also known as FDM, which simplifies its use. On a personal note, the build space of 254 * 228.6 8 *203.2mm is better than many DIY and beginner 3D printers but can be limiting when compared to a few other very popular options, like the Creatlity 10S. Build volume is a defining metric of the Creality too, so losing to it isn’t necessarily a damning indictment.
Another feature that highlights its versatility and ease of use tag is the automatic leveling and self-calibrating feature associated with the Robo R1+. Unlike its competitors, this 3D printer comes with an automated print bed that actually works. This eliminates the need for multiple calibrations when your nozzle head starts extruding filament. Before we goo too much further, here is another feature you need to take into consideration when printing your models; the Robo R1+ nozzle is a single extruder with a diameter of 0.4mm which allows it executes its job efficiently.
To get the Robo R1+ printing, feed your sliced models to it using a standalone SD card or USB connection. Your print will then print using a maximum print speed of 50m/s at a layer resolution of 50 – 300 microns. This resolution is great for printing some very detailed 3D models. Its printing features give you great control over the quality and speed at which you can execute your projects.
The Robo R1+ versatility also extends to its compatibility with different types of filaments. According to Robo’s official guide, its 3D printer can create models using 30 different filament types which includes; PLA, ABS, wood, TPU etc.
The Robo R1+ Printing Software
The field of additive manufacturing is increasingly providing features that ensure every device you use is truly versatile. The R1+, like most modern desktop 3D printers, supports almost all the open-source software applications out there. The printer is also supportive of Apple iOS, Mac OS, Windows and Linux ecosystems.
Other Cool Features
A stand-out bonus feature of note is the 1-year subscription to Autodesk Fusion 360 which comes with the Robo R1+ Package. This means that you can create, edit and analyse digital 3D models on-the-go via your PC as well as smart devices! This is obviously a boon for 3D printing enthusiasts who are proficient with using computer-aided design (CAD) tools to create printable 3D models. I can’t help but note that Autodesk Fusion 360 is an outstanding software and well worth it.
Is it decision time already?
The Robo R1+ is beutiful in both its form and function. It’s nice to see a machine that sets out with a goal and surpasses it. Yes, this machine is great for beginners, but it’s a machine that grows in capability with it’s user. Is it as refined as the LulzBot Taz 6? No, is it about $2,000 dollars cheaper. Yes. Pick this 3D printer if you don’t want to get involved in the DIY movement, and you just want a 3D printer that will get you going immediately.
Now you have a choice to make. Do you want to do nothing at all, and keep putting off the decision to start on this awesome 3D Printer hobby? You know how that will turn out. Do you really want to continue to procrastinate? Take action and turn your daydreams into reality. Finally get that 3D Printer, and make your thoughts real objects you can hold in your hand.
It’s time to say goodbye now, but first here’s what you do now. Click the button below to go to Amazon, add this bad boy to your cart, and proceed to checkout. Don’t forget to stock up on filament to start too.