
During the lifetime of your 3D printer, you will most likely need to replace your 40mm filament and extruder cooling fans. Why did I replace my filament cooling fan? What can you learn from my experience? As it turns out, plenty. Join me while I explain.
Quick Backstory
I recently replaced the filament cooling fan duct on my 3D printer. The issue I was having and the solution I came up with are documented here. At that point, I thought I was done for a while, but my printer had other ideas.
The Tale of the Noisy Cooling Fan
After replacing my stock fan duct with the 3D printed one, I went back to my usual process of modeling and printing prototypes. Not long after, however, I noticed that the filament cooling fan was getting very noisy, rattling and making a high pitched whine when it first started up. Excess noise is a clear sign of a problem, so I started investigating.
This story will focus on my Monoprice Maker Select Plus, but the issue can affect just about every cartesian and delta style printer. Basically anywhere a fan is used, there is potential for it to need replacing. On the print head of a 3D printer, excess vibration from a failing fan will affect print quality, so you don’t want to let it go too long.
On my Monoprice Maker Select Plus, the filament cooling fan is directly on the front of the extruder. When I printed the new duct I didn’t change the layout, so the fan is still easily accessible. Good thing.
First things first I had to conduct a highly technical analysis. I found that if I gave the front of the fan a quick tap, it would quiet down. Like I said, highly technical.
The bearing must be going bad. A common problem among cooling fans (or basically any component with spinning parts).
The bearing had probably been deteriorating for a while, but the stock steel duct had been dampening the vibrations. The new plastic one just isn’t heavy enough to do the same. It would have been noticeable eventually, even with the original duct. The swap just allowed me to find, and fix, the problem sooner.
It Always Comes Down to Price Point
As I showed during my duct replacement process, the print head on my printer has two 40mm fans on it. One to cool the extruder, and one to cool the filament as it leaves the nozzle:
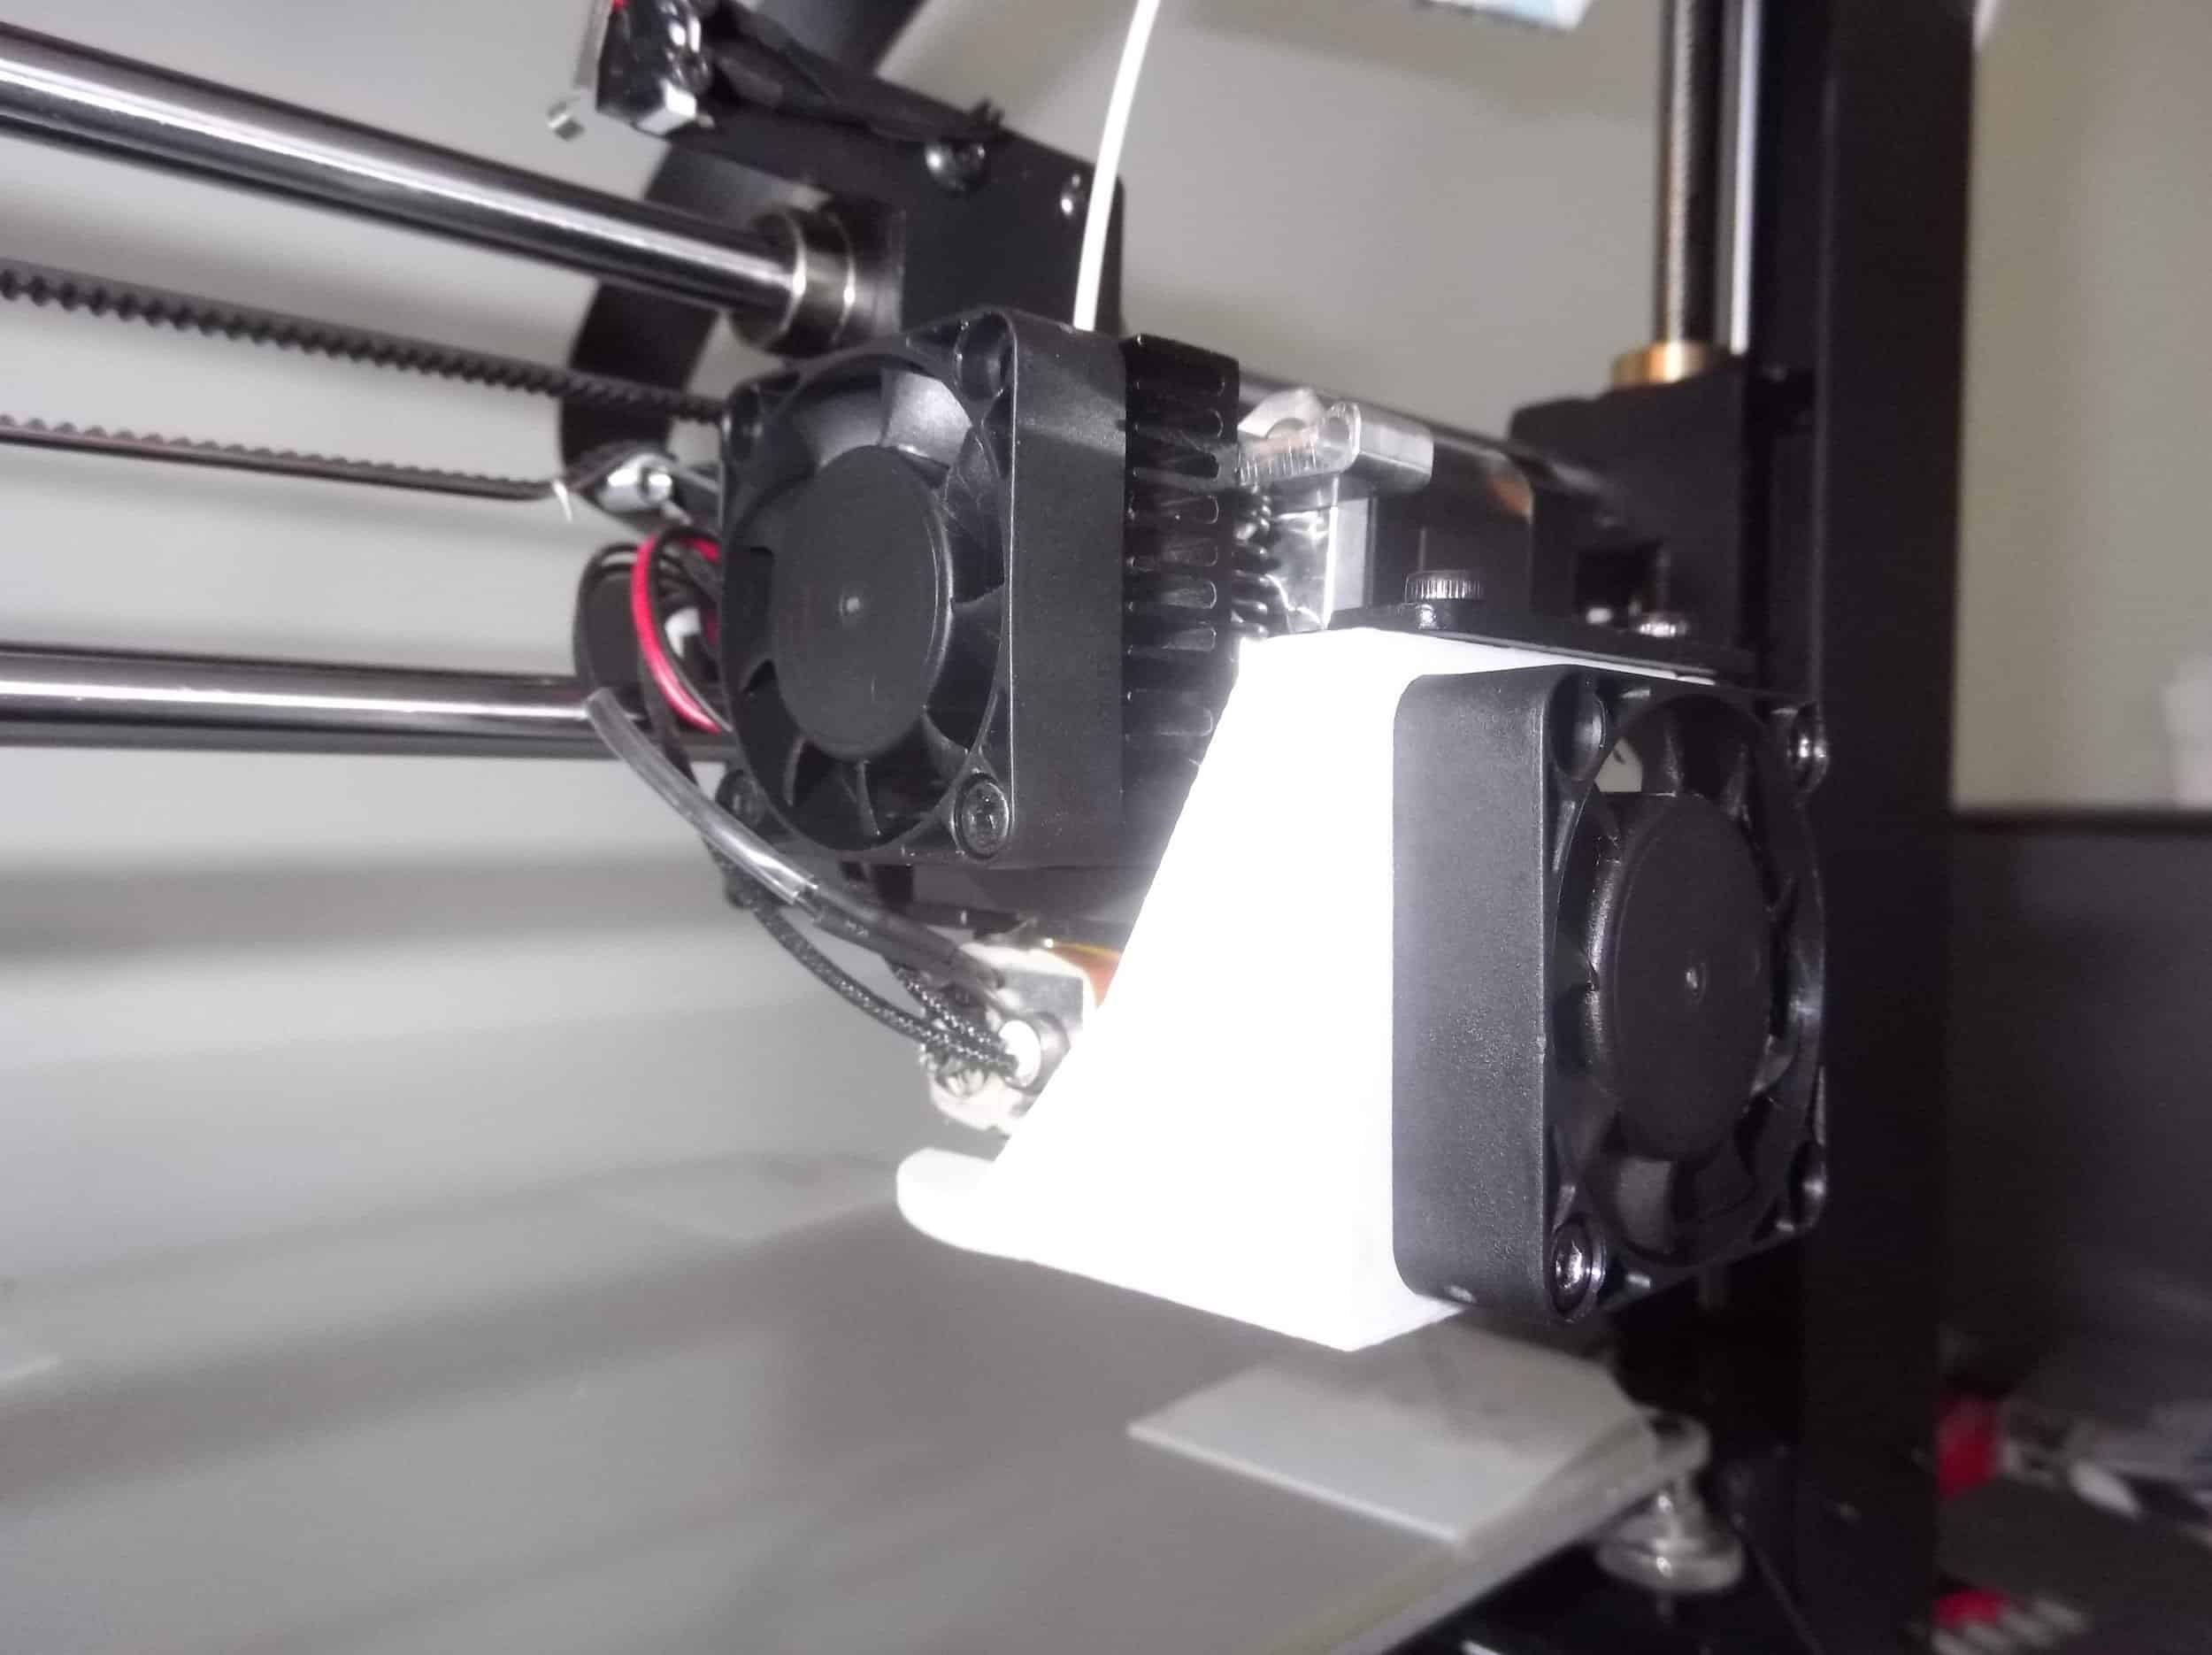
These appear to be the exact same fan model, which makes sense.
When it comes to electronics, you can almost always guarantee a price break when you order in quantity. Using the same fan in both positions probably makes designing the print head easier too.
However, since they are the same model fan, there’s a good chance the one on the hot end is also going bad, but I’ll deal with that when the time comes.
A failing fan doesn’t bother me that much. I knew when I bought a fairly inexpensive printer there would be some trade-offs. When the whole printer costs around three hundred dollars, the manufacturer can’t spend fifty of that on fans, so I would expect them to be pretty low quality.
As far as problems that could occur on a 3D printer, a failing fan is pretty minor and easy to fix. So, what’s it going to take?
Bring Me the Specs
To get replacement parts for your printer, you have to know what it is you are replacing. Seems simple, right? Yes and no. Just by measuring the casing, I knew I needed a 40mm cooling fan, but what other important information is there?
This kind of fan is very common because they are used in a variety of computers, networking hardware, and consumer electronics. However, not all these devices use the same operating voltage, so it isn’t enough to just know the size.
40mm fans are commonly available in 5, 12, and 24-volt versions. The easiest way to find out which one you need is to look at the current fan. The specifications are written on the side of the cover that faces the cooling duct.
It’s just a couple of screws to remove, and the information is right in front of me.
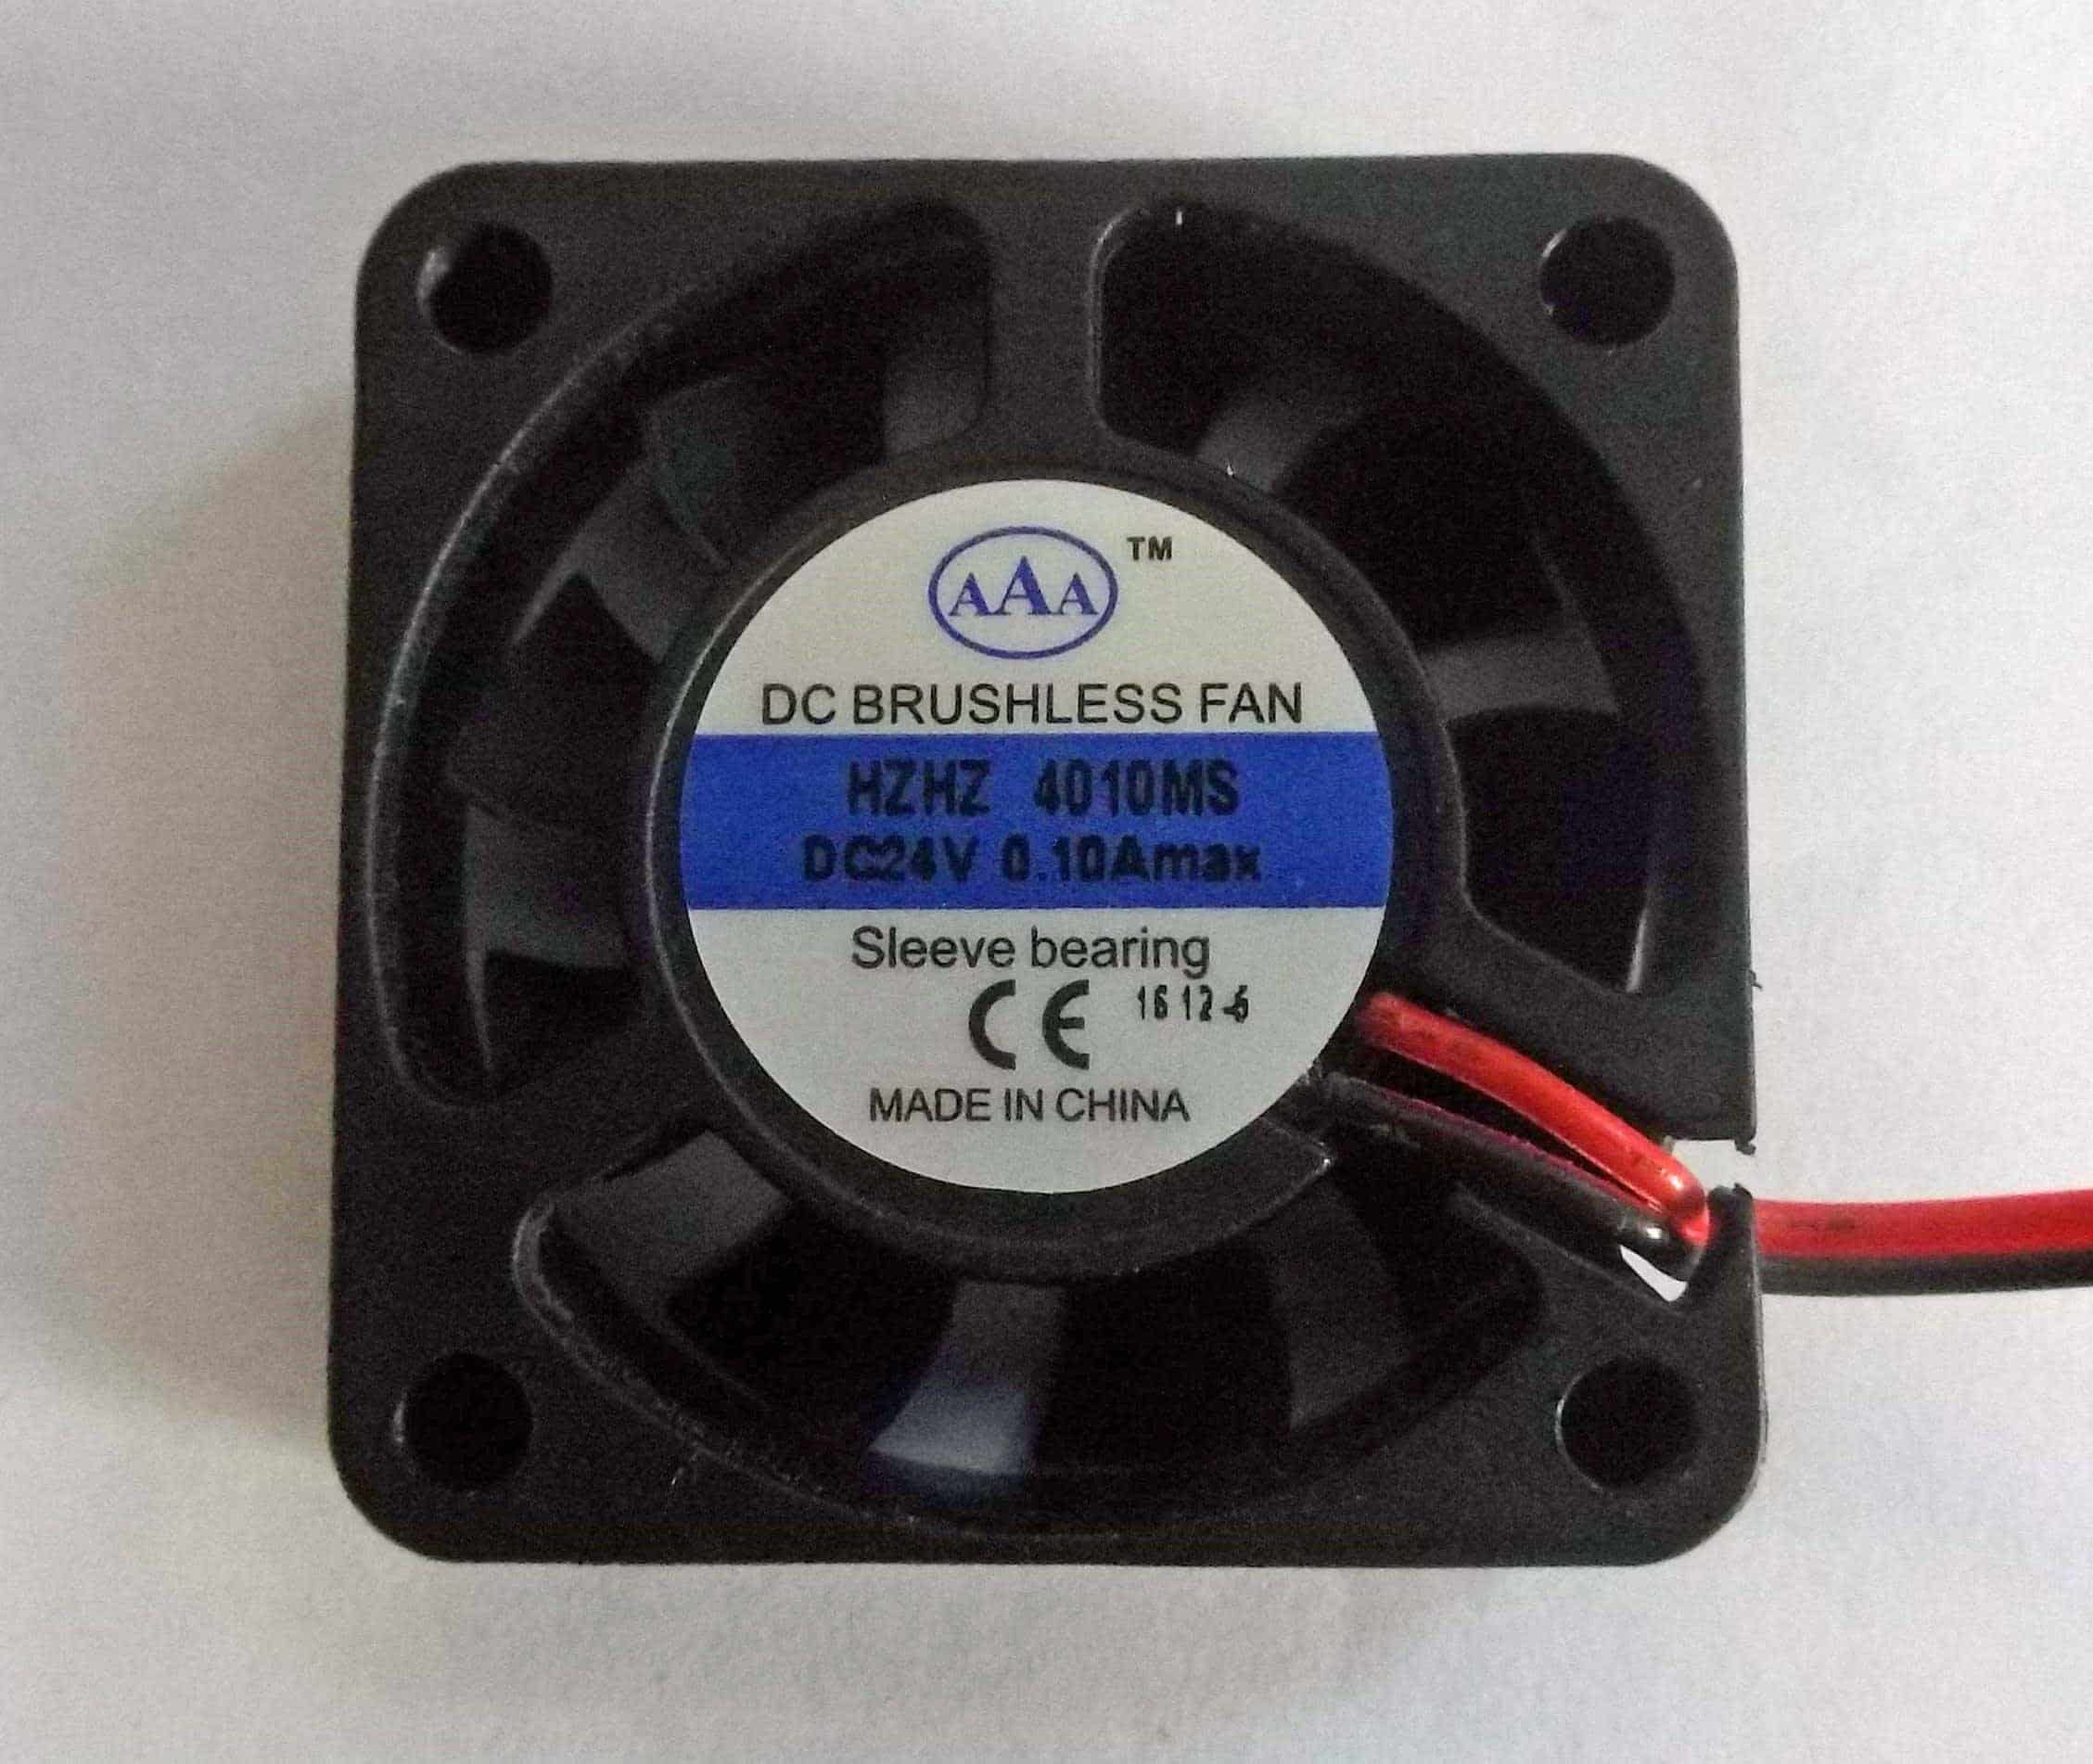
The fan says DC24V in the blue ribbon. It also says it has a maximum current draw of 0.10 amps. Given that information, I know that most 24 volt, 40mm fans should work.
Important: If your printer runs on 24 volts, do not use a 12 or 5-volt motor. The parts used in lower voltage fans are not designed to handle 24 volts and there is a very high risk of fire.
Which fan should I buy though?
A quick search on Amazon shows a huge number of fans of varying price, available with 2, 3, or even 4 leads (wires). Be sure to read the descriptions though. Many of my search results were 12v fans, not the 24v that I need.
As for the number of leads, that generally determines additional capabilities of the fan. The fans on my printer only have two leads coming off them. This means the printer powers them and does nothing else. A fan with three leads is capable of providing feedback to the system, saying how fast it is turning, like a tachometer on a car.
My printer can’t make use of this signal, but it won’t hurt it if the fan I buy has an extra, unused lead.
In the end, I decided to go with this Adda 40mm cooling fan. It’s more expensive than some of the other options, but I figured I didn’t want to replace it again any time soon. It has three leads, so there is one that won’t be used.
I could remove it, but maybe I’ll want to connect something to it later, so I’ll just cover the exposed end and tie it off for now. I love to tinker, so this is highly likely.
One thing this fan doesn’t come with is a connector. That’s ok. My electronics workbench is well equipped to deal with that. However, if you need to do a fan swap and don’t happen to have solder and heat shrink laying around, there are fans available that have the connector already attached. For instance, this Sound Original Brushless DC Cooling Fan set would work on my printer.
Paying for Peace of Mind
At this point, you may be wondering why I chose a fairly expensive fan that I have to put a connector onto myself.
Basically, I’m paying for peace of mind. I don’t want to have to keep changing fans, and the motion that they are subjected to being attached to a moving print head is tough on the bearings.
Because of that, I wanted a higher quality fan with a different bearing type. I’ll go into that in more detail in a bit.
If you follow my writing you’ll notice this tendency. I like to make my own solutions, but if I’m buying something I want quality.
Removing the Old Fan
Fortunately, the fan connections on the Maker Select Plus are very easy to get to. You just remove the back cover behind the extruder:
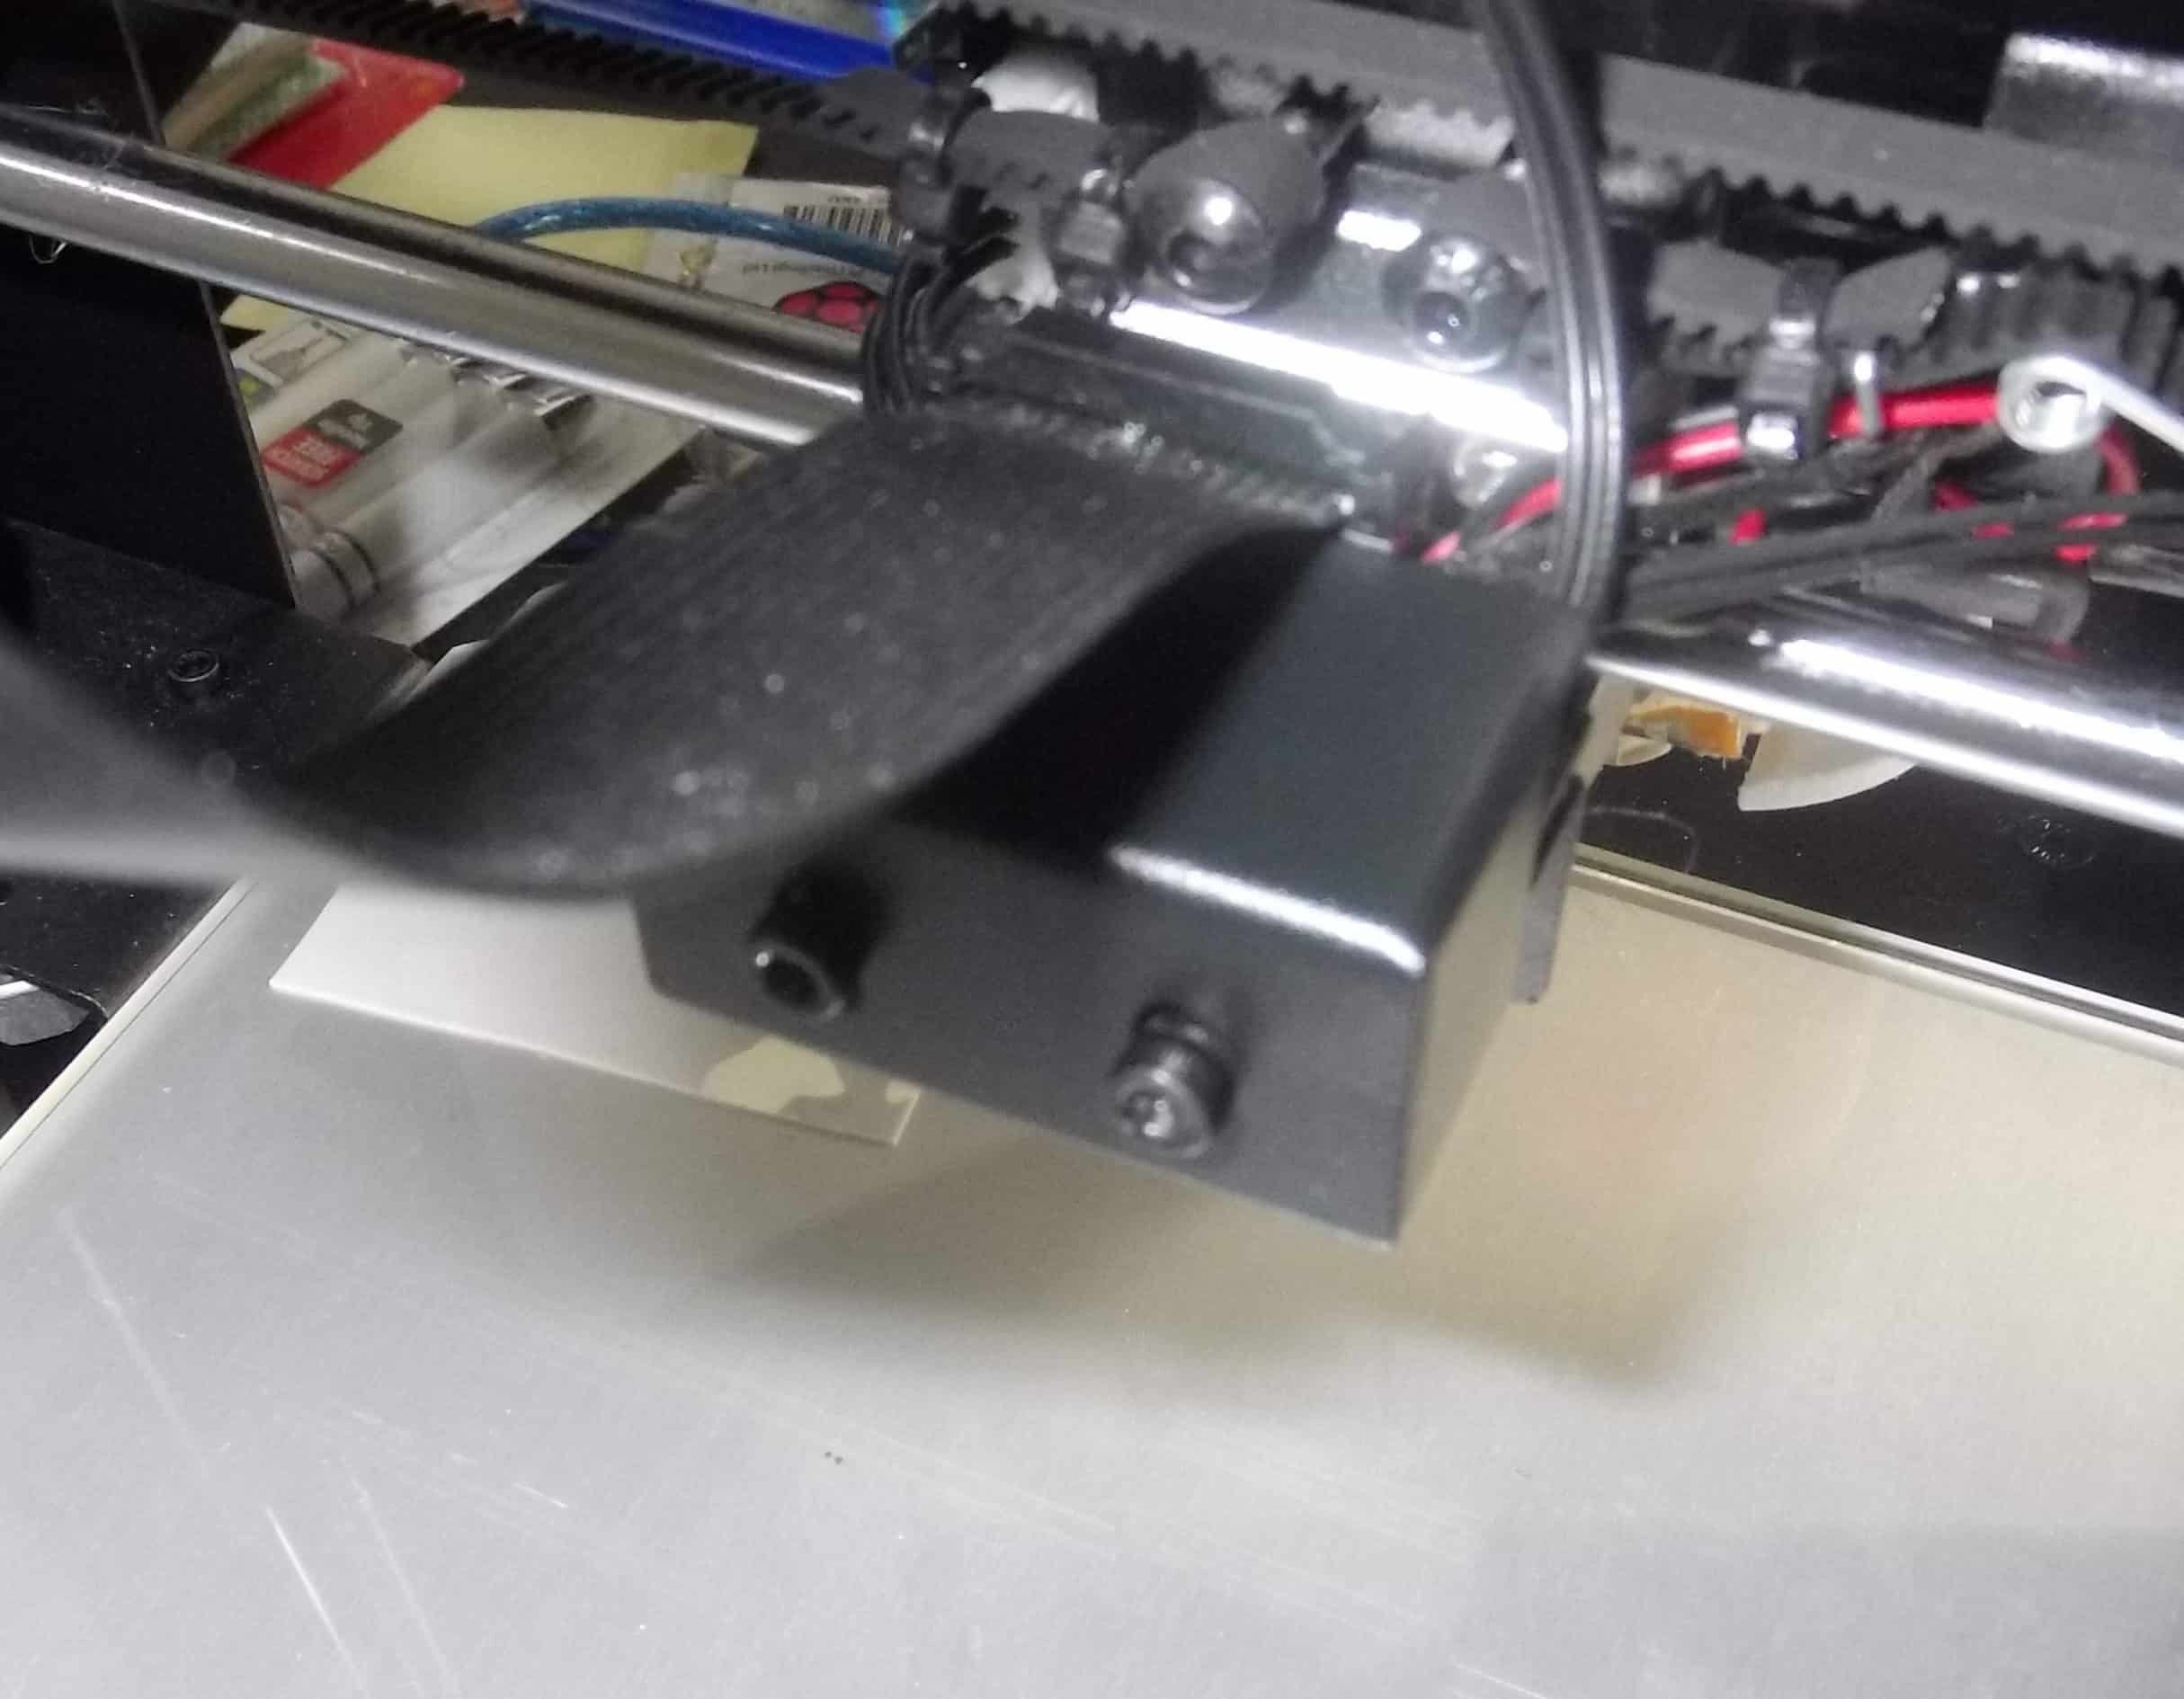
Then disconnect the primary ribbon cable so it stays out of the way. All the print head connections are then visible.
The filament cooling fan connection is behind the ones for the x-axis limit switch and the extruder cooling fan. There are a few leads covering it, so in the picture, I’m using tweezers to hold them out of the way.
The connection for the filament cooling fan is circled in red.
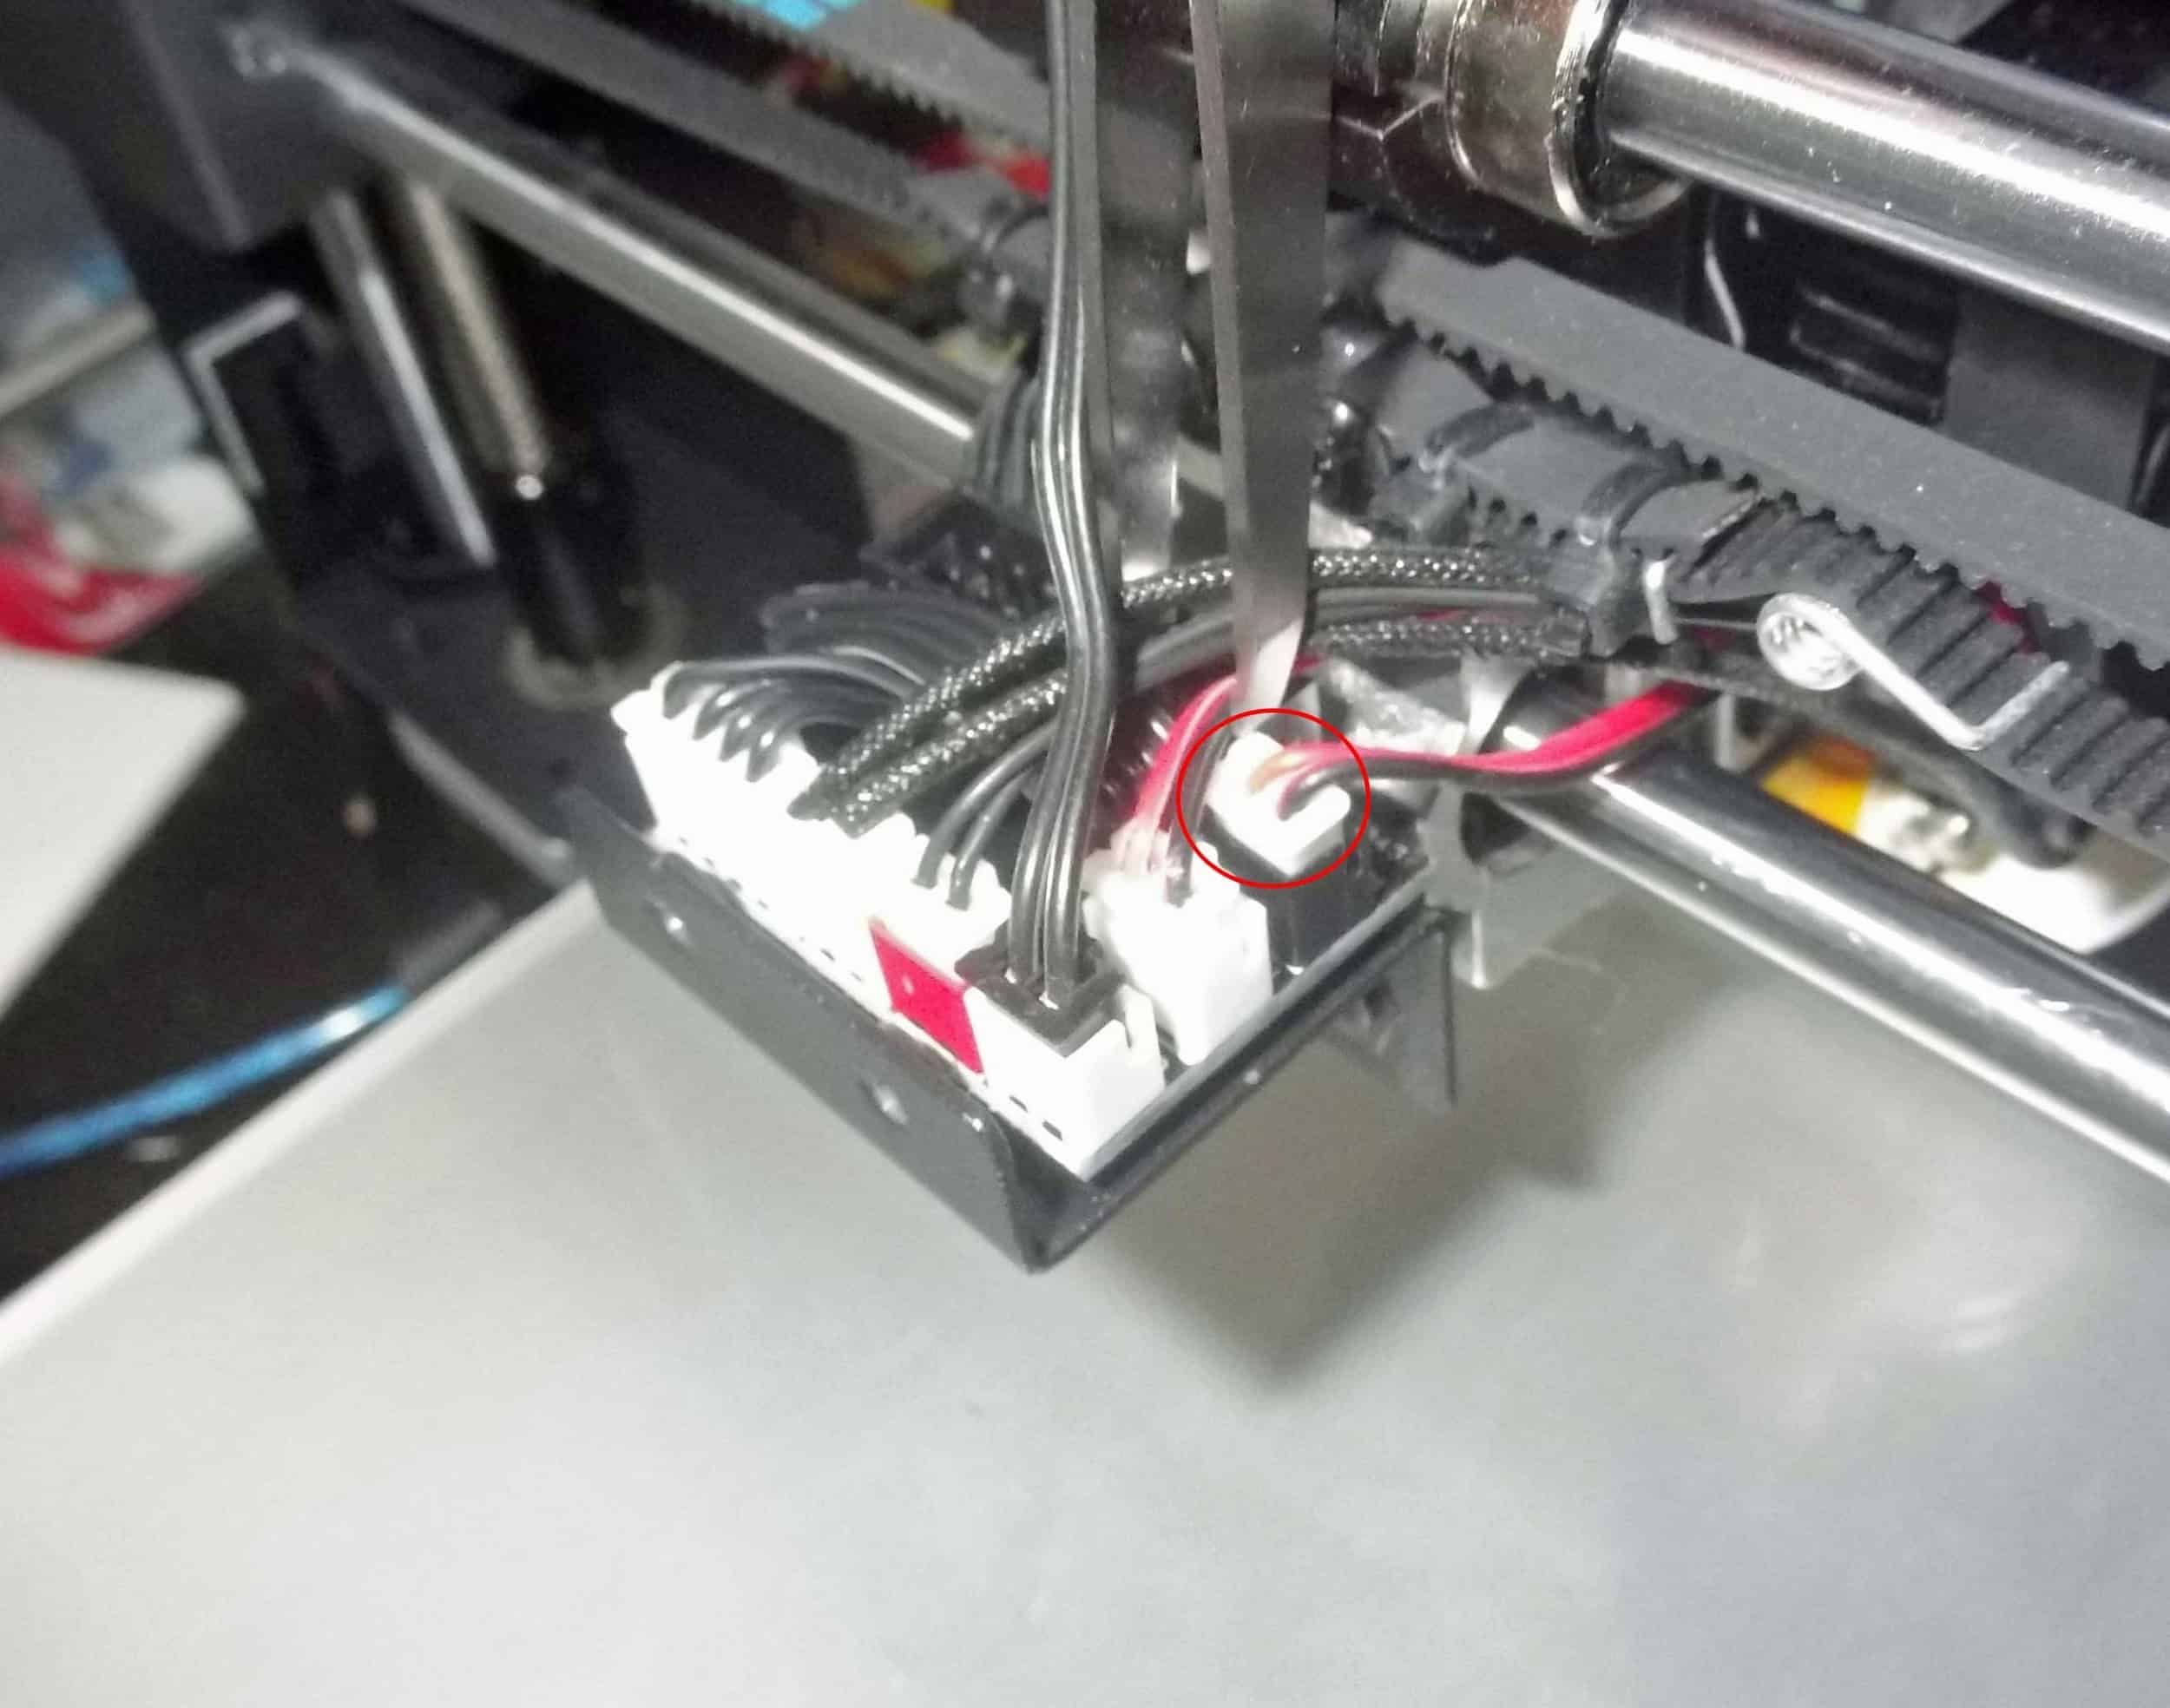
To remove the fan, all you need to do is disconnect that connector, unscrew the fan from the cooling duct, and thread the connector and leads out of the print head.
At this point, if I had purchased a drop-in replacement with a connector, I could just put it on and be done.
That would be too easy though. As someone who deals with electronics, I want to know exactly what went wrong with this fan.
If a teardown of the old fan and a comparison with the new one doesn’t interest you, feel free to skip down a couple of sections.
Looking Inside
Since the problems I was experiencing were excessive noise and vibrations, my first suspect is the bearing on the fan. If the bearing is in good working order, the fan blades shouldn’t be able to vibrate that much.
What kind of bearing is the original fan using? Surprisingly it says right on the label: sleeve bearing, but what does that mean?
A sleeve bearing is one of the simplest, cheapest types of bearings available. It is made up of a cylindrical sleeve with a shaft through it. Below is a simple example. The sleeve (blue) and shaft (red) are made of a smooth material (usually metal) that allows the shaft to rotate freely in the sleeve. Generally, some lubricant is used between the two to reduce friction.
Peeling back the label on the fan I just removed, you can see the top of the shaft, held in place by a white plastic retainer ring. Also visible is a circular, wet area on the housing where most of the lubricant has migrated away from the bearing.
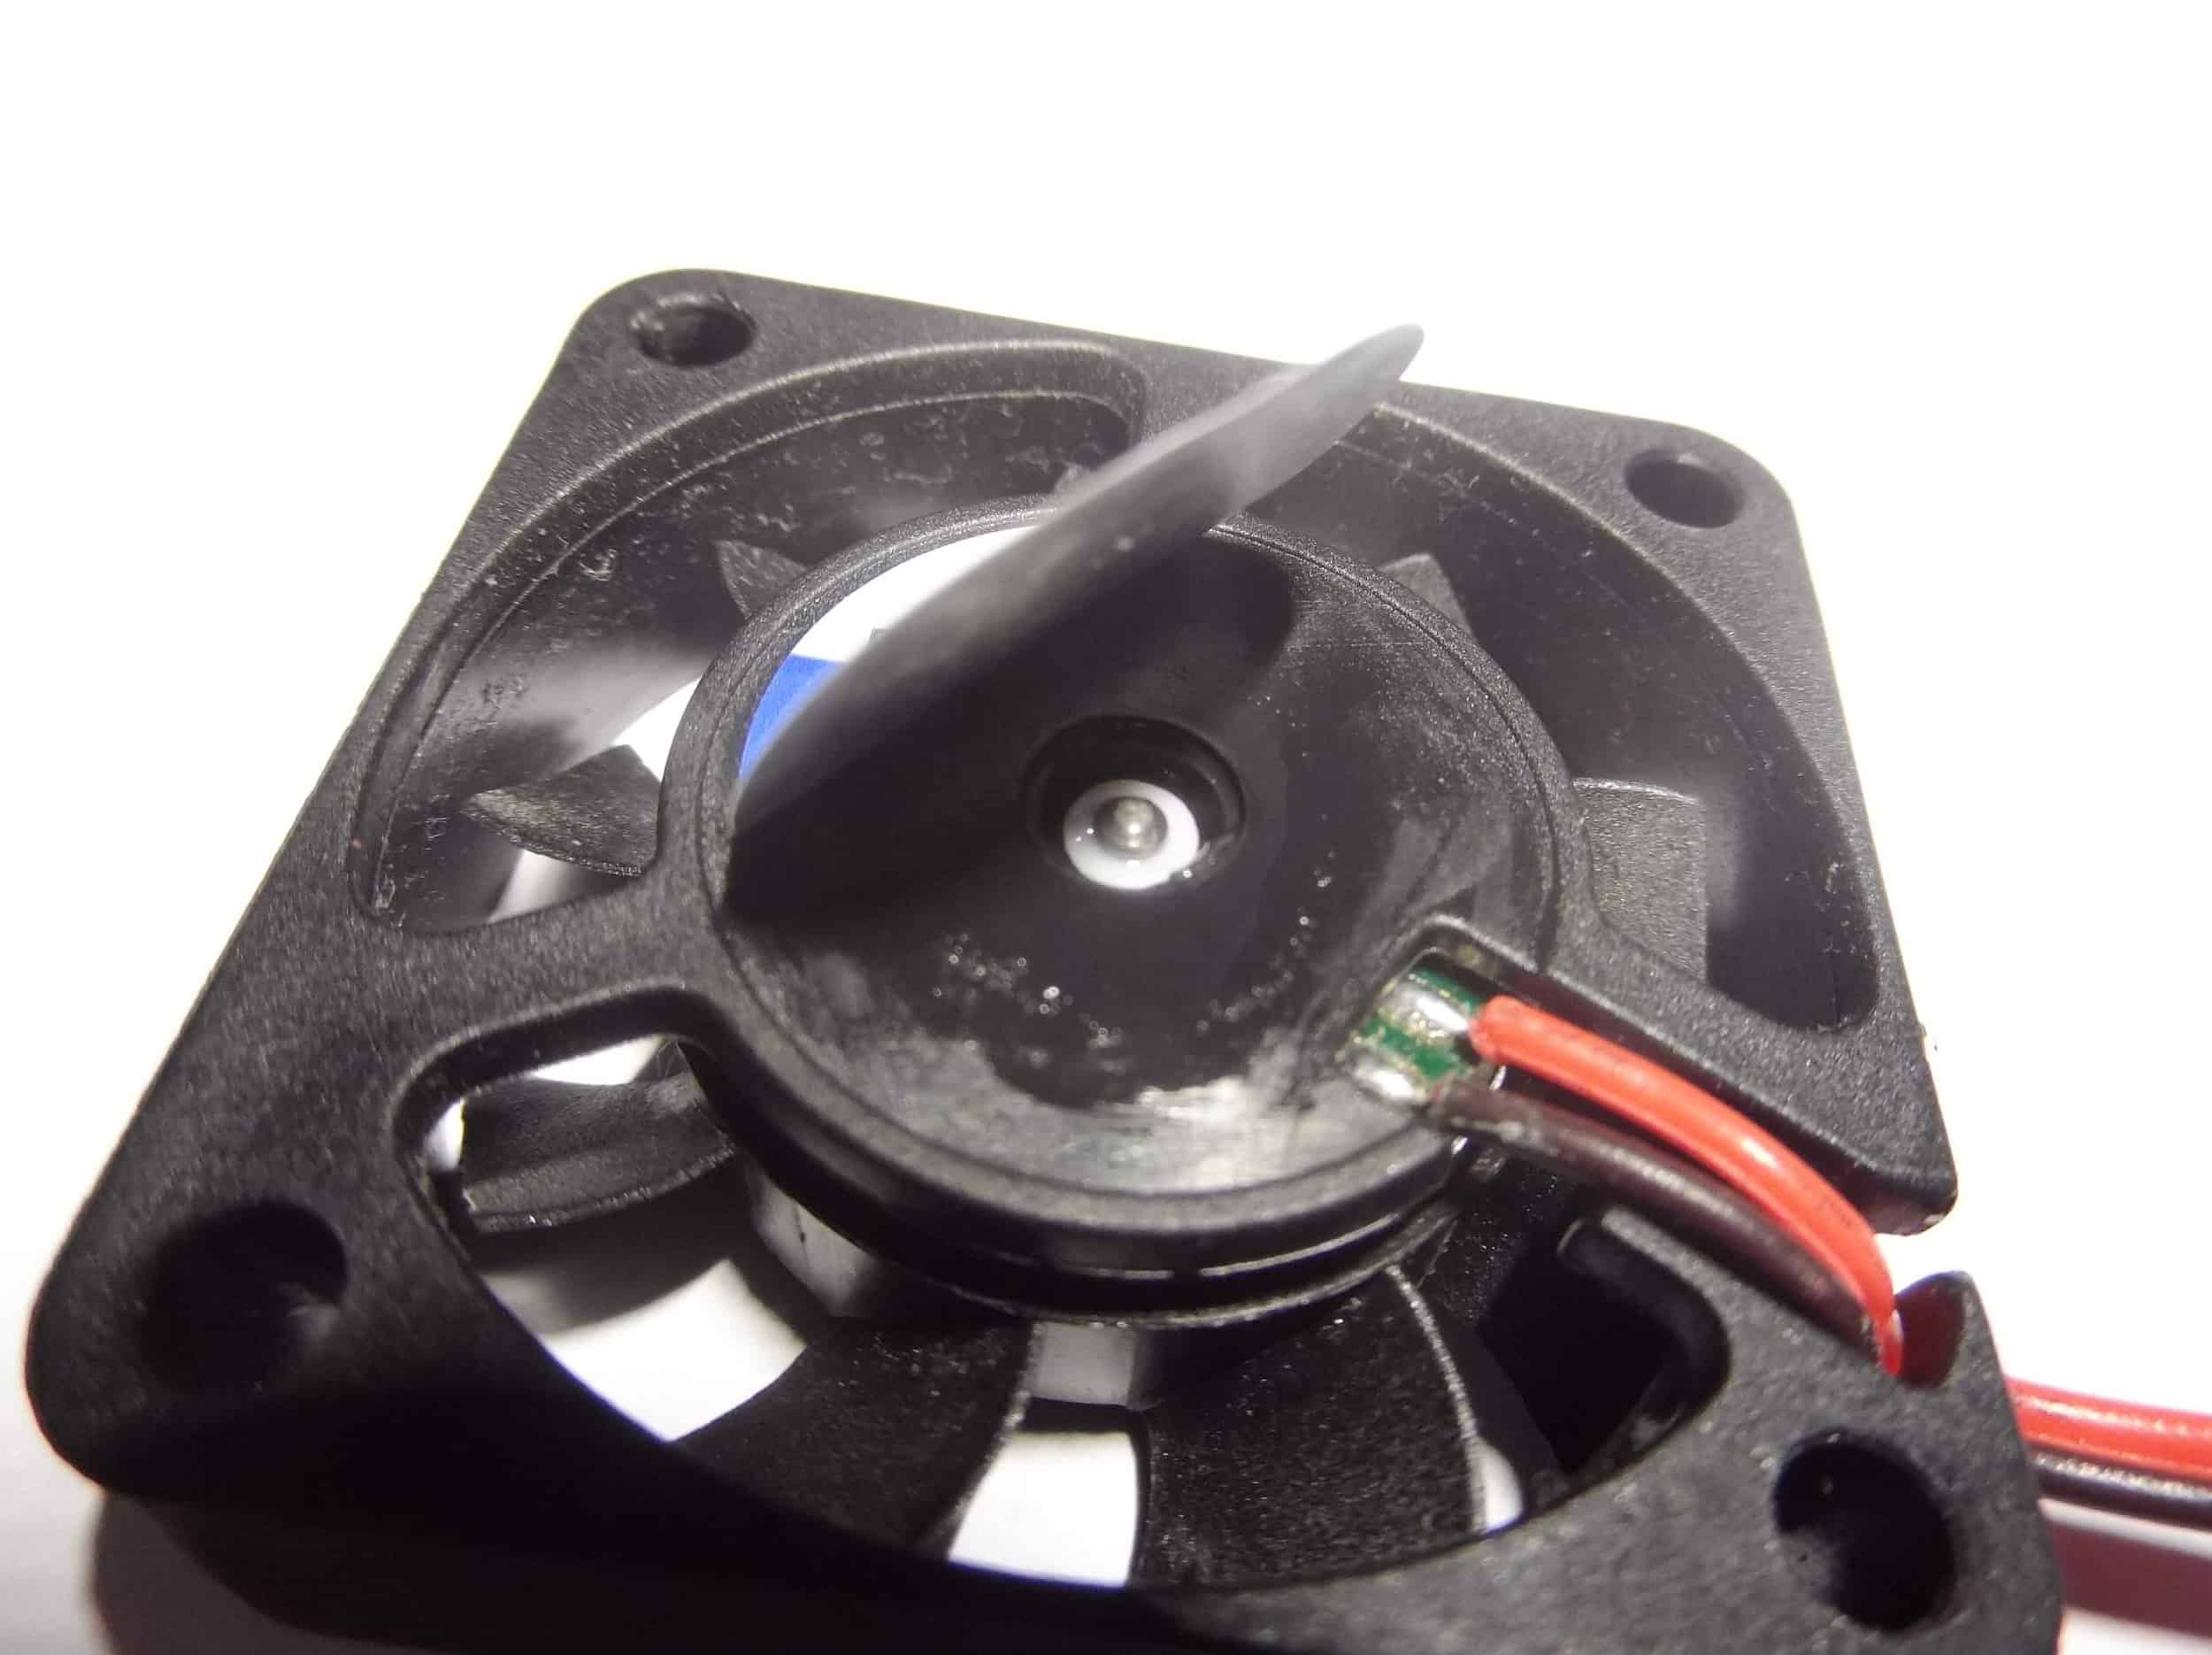
Moving the rotating portion of the fan my hand, I can definitely wiggle it from side to side a little. This is a bad sign for a sleeve bearing. It means the shaft is no longer tight inside the sleeve, which will result in vibration and noise. Sound familiar?
Under the Scope
Since this fan is already worn out, I won’t feel bad about taking it apart and examining it a little bit further. You know, for science!
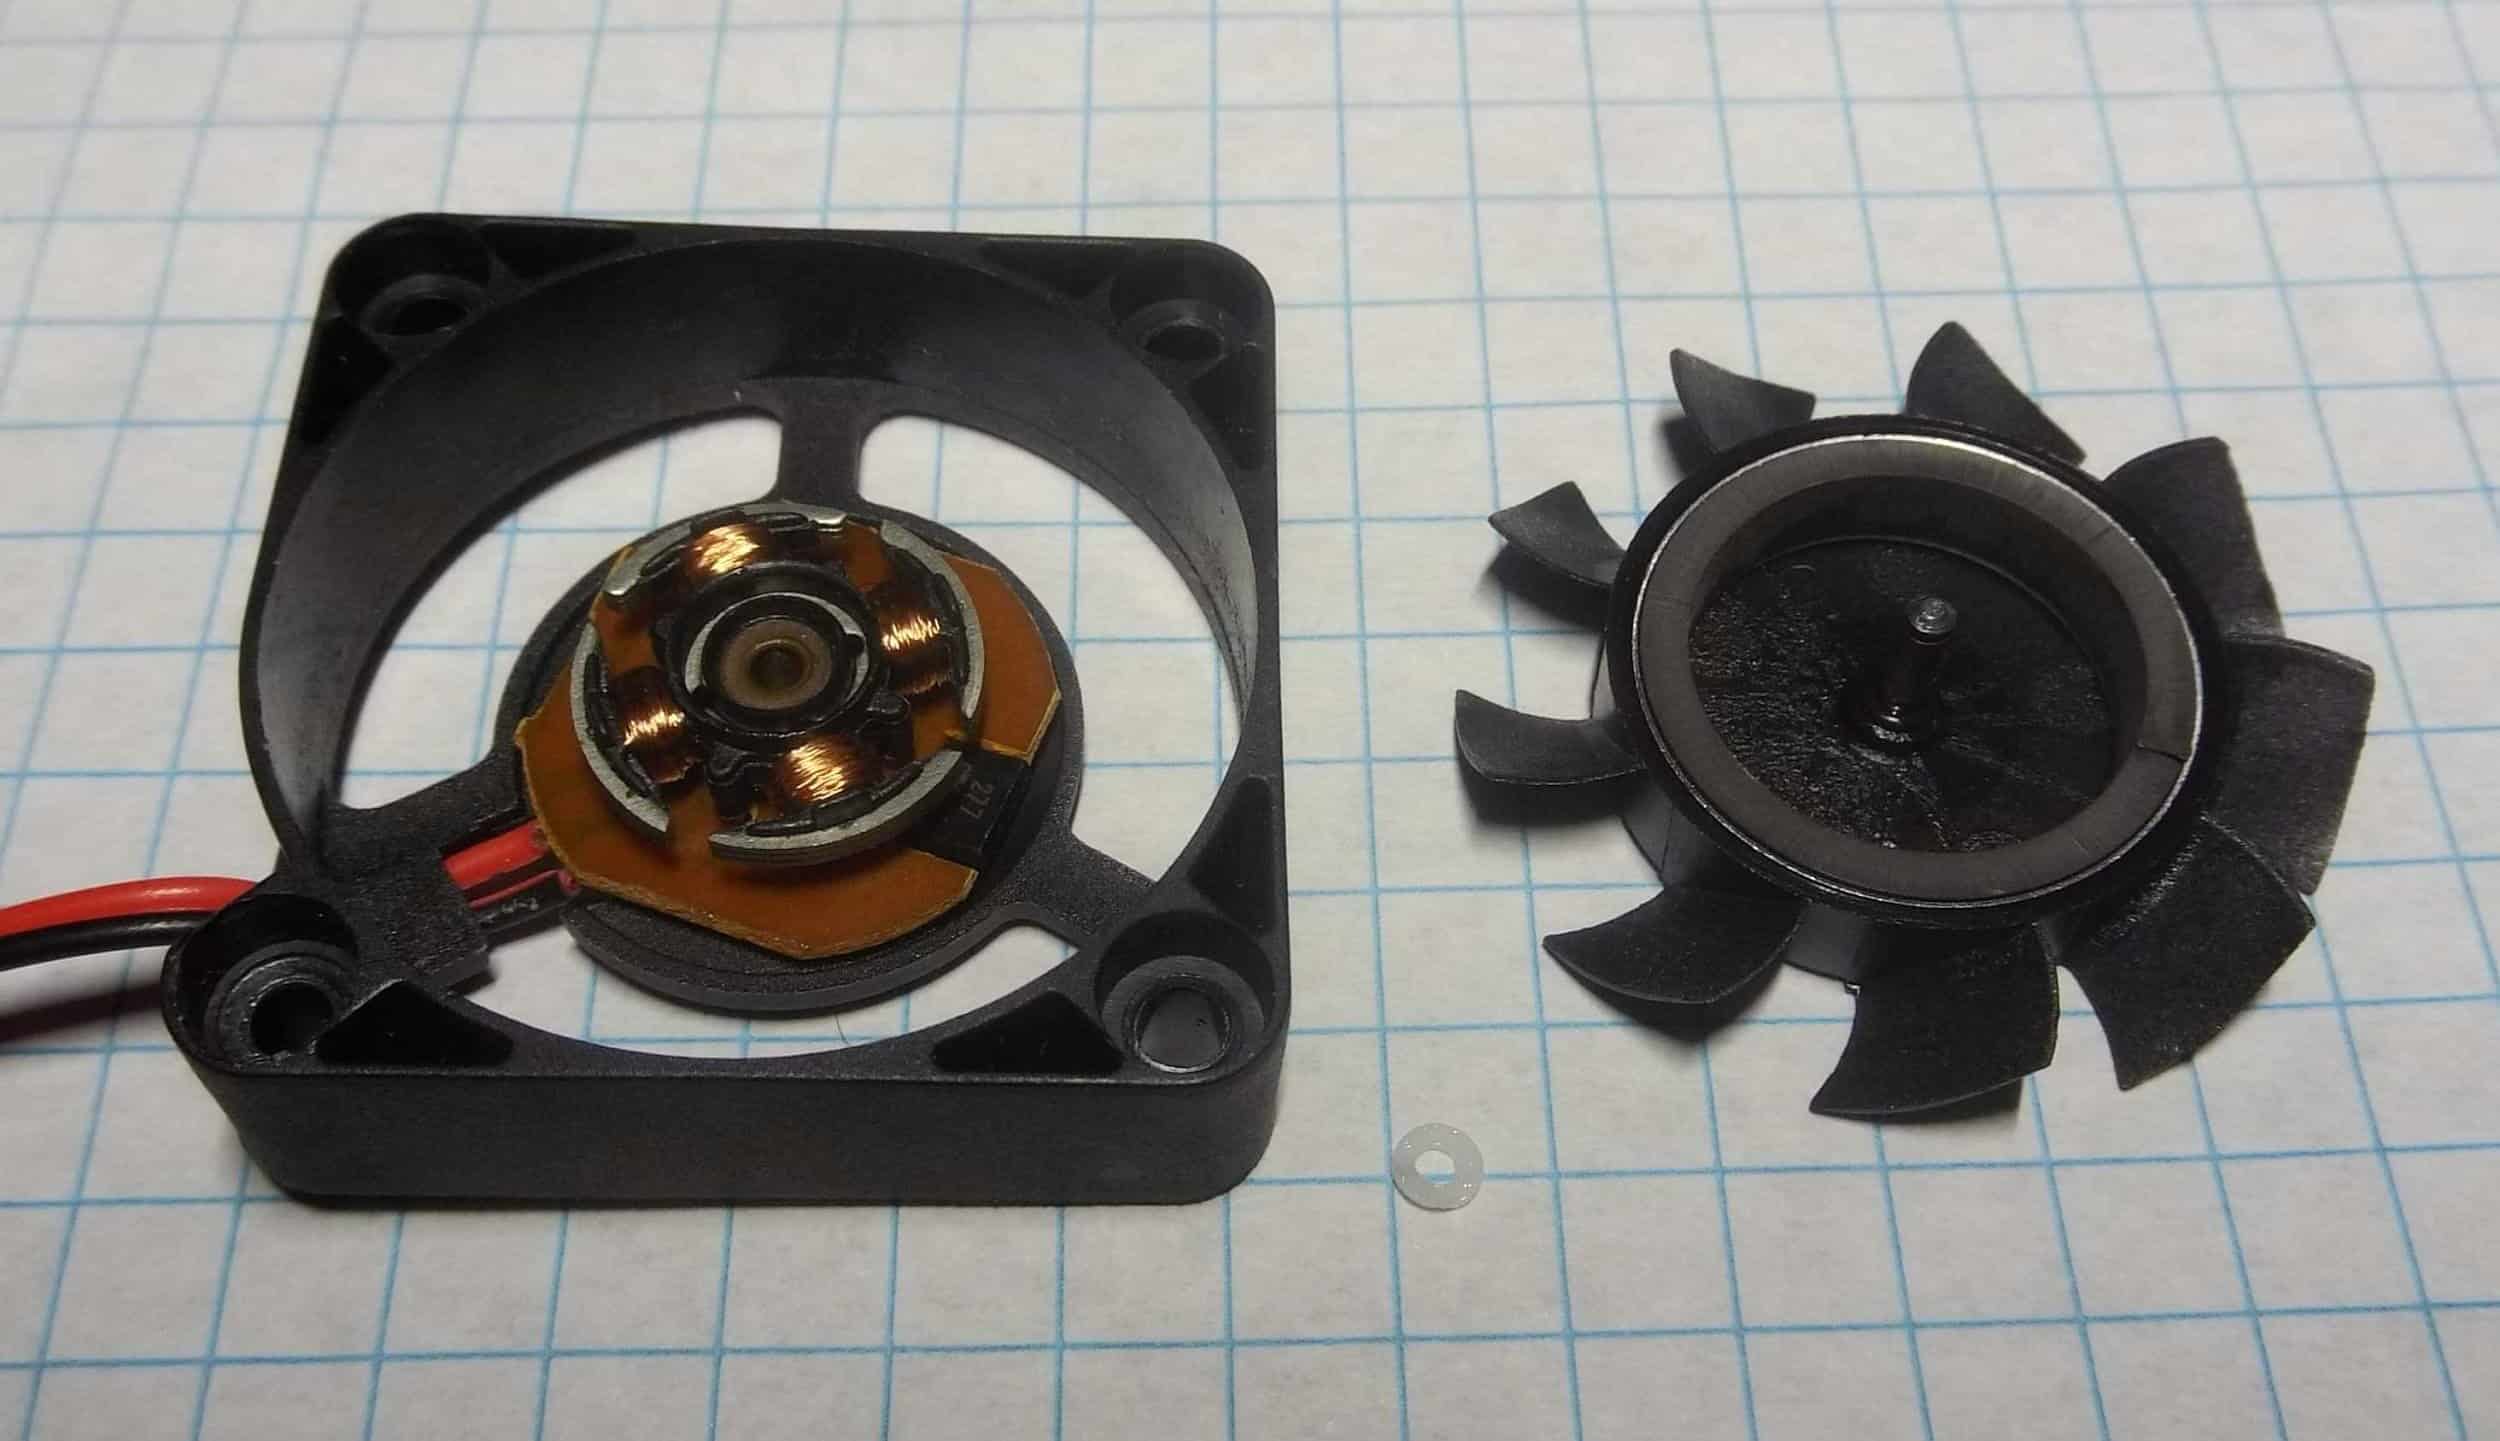
Removing the white plastic retainer allows the fan blades to be separated from the housing. Underneath you can see the simple motor stator with four windings.
In the middle is the bearing sleeve, which appears to be made of brass.
With this type of bearing I would expect both the sleeve and the shaft to be very smooth to eliminate as much friction as possible.
Putting the bearing sleeve under my inspection camera, however, you can see that it isn’t smooth at all. The surface where the sleeve touches the shaft is irregular and pitted. It actually looks like some of the brass has been flaking off.
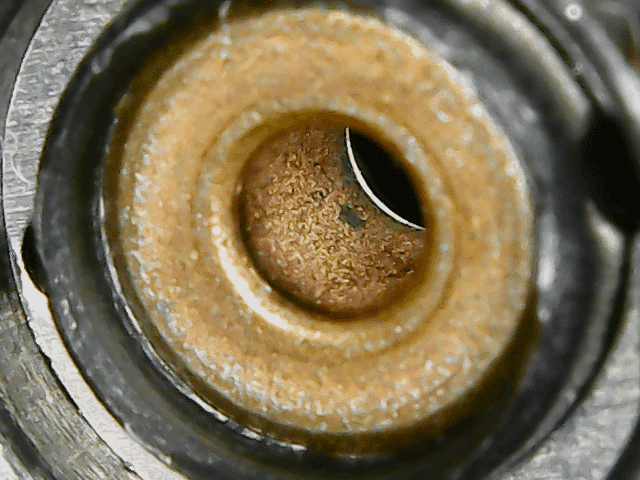
This kind of wear kills sleeve bearings, but the surface was probably not very smooth, to begin with. Obviously, this inexpensive bearing was never intended to last very long.
In With The New
That’s probably enough analysis for now. According to the description of my new fan, it uses a ball bearing instead of a shaft bearing. That is one of the other reasons I chose it.
A ball bearing should be reliable over a much longer time span than a cheap shaft bearing. This is because instead of relying only on smooth surfaces and lubricant to reduce friction, a ball bearing literally has tiny balls rolling around between the shaft and the race, which replaces the sleeve found in a sleeve bearing.
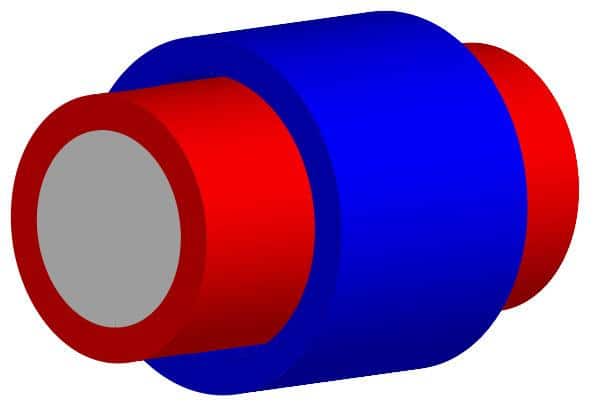
Here is what a basic ball bearing looks like from above.
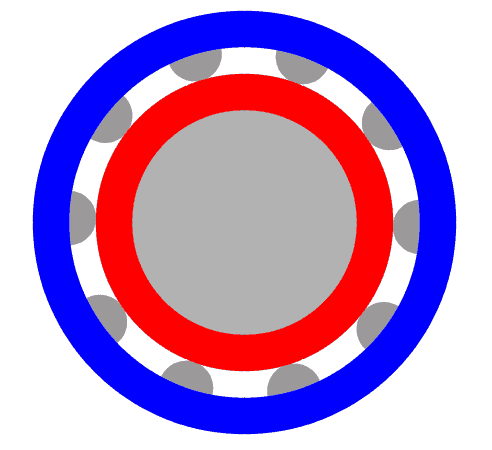
As the shaft (red) rotates, the balls roll within the race (blue), resulting in very little friction (the race is U-shaped, so from the side you only see about half of each ball).
If you have ever tried sitting on a ball, you know how easily it will roll out from under you. A ball bearing uses the same principal.
Moving On
That’s probably enough nerding out about bearings. One last difference between the two fans is the new one has larger blades. The manufacturer is using smaller motor components, allowing the center section to be smaller, and leaving more room for fan blades.
Hopefully, this will allow it to push more air through my cooling duct.
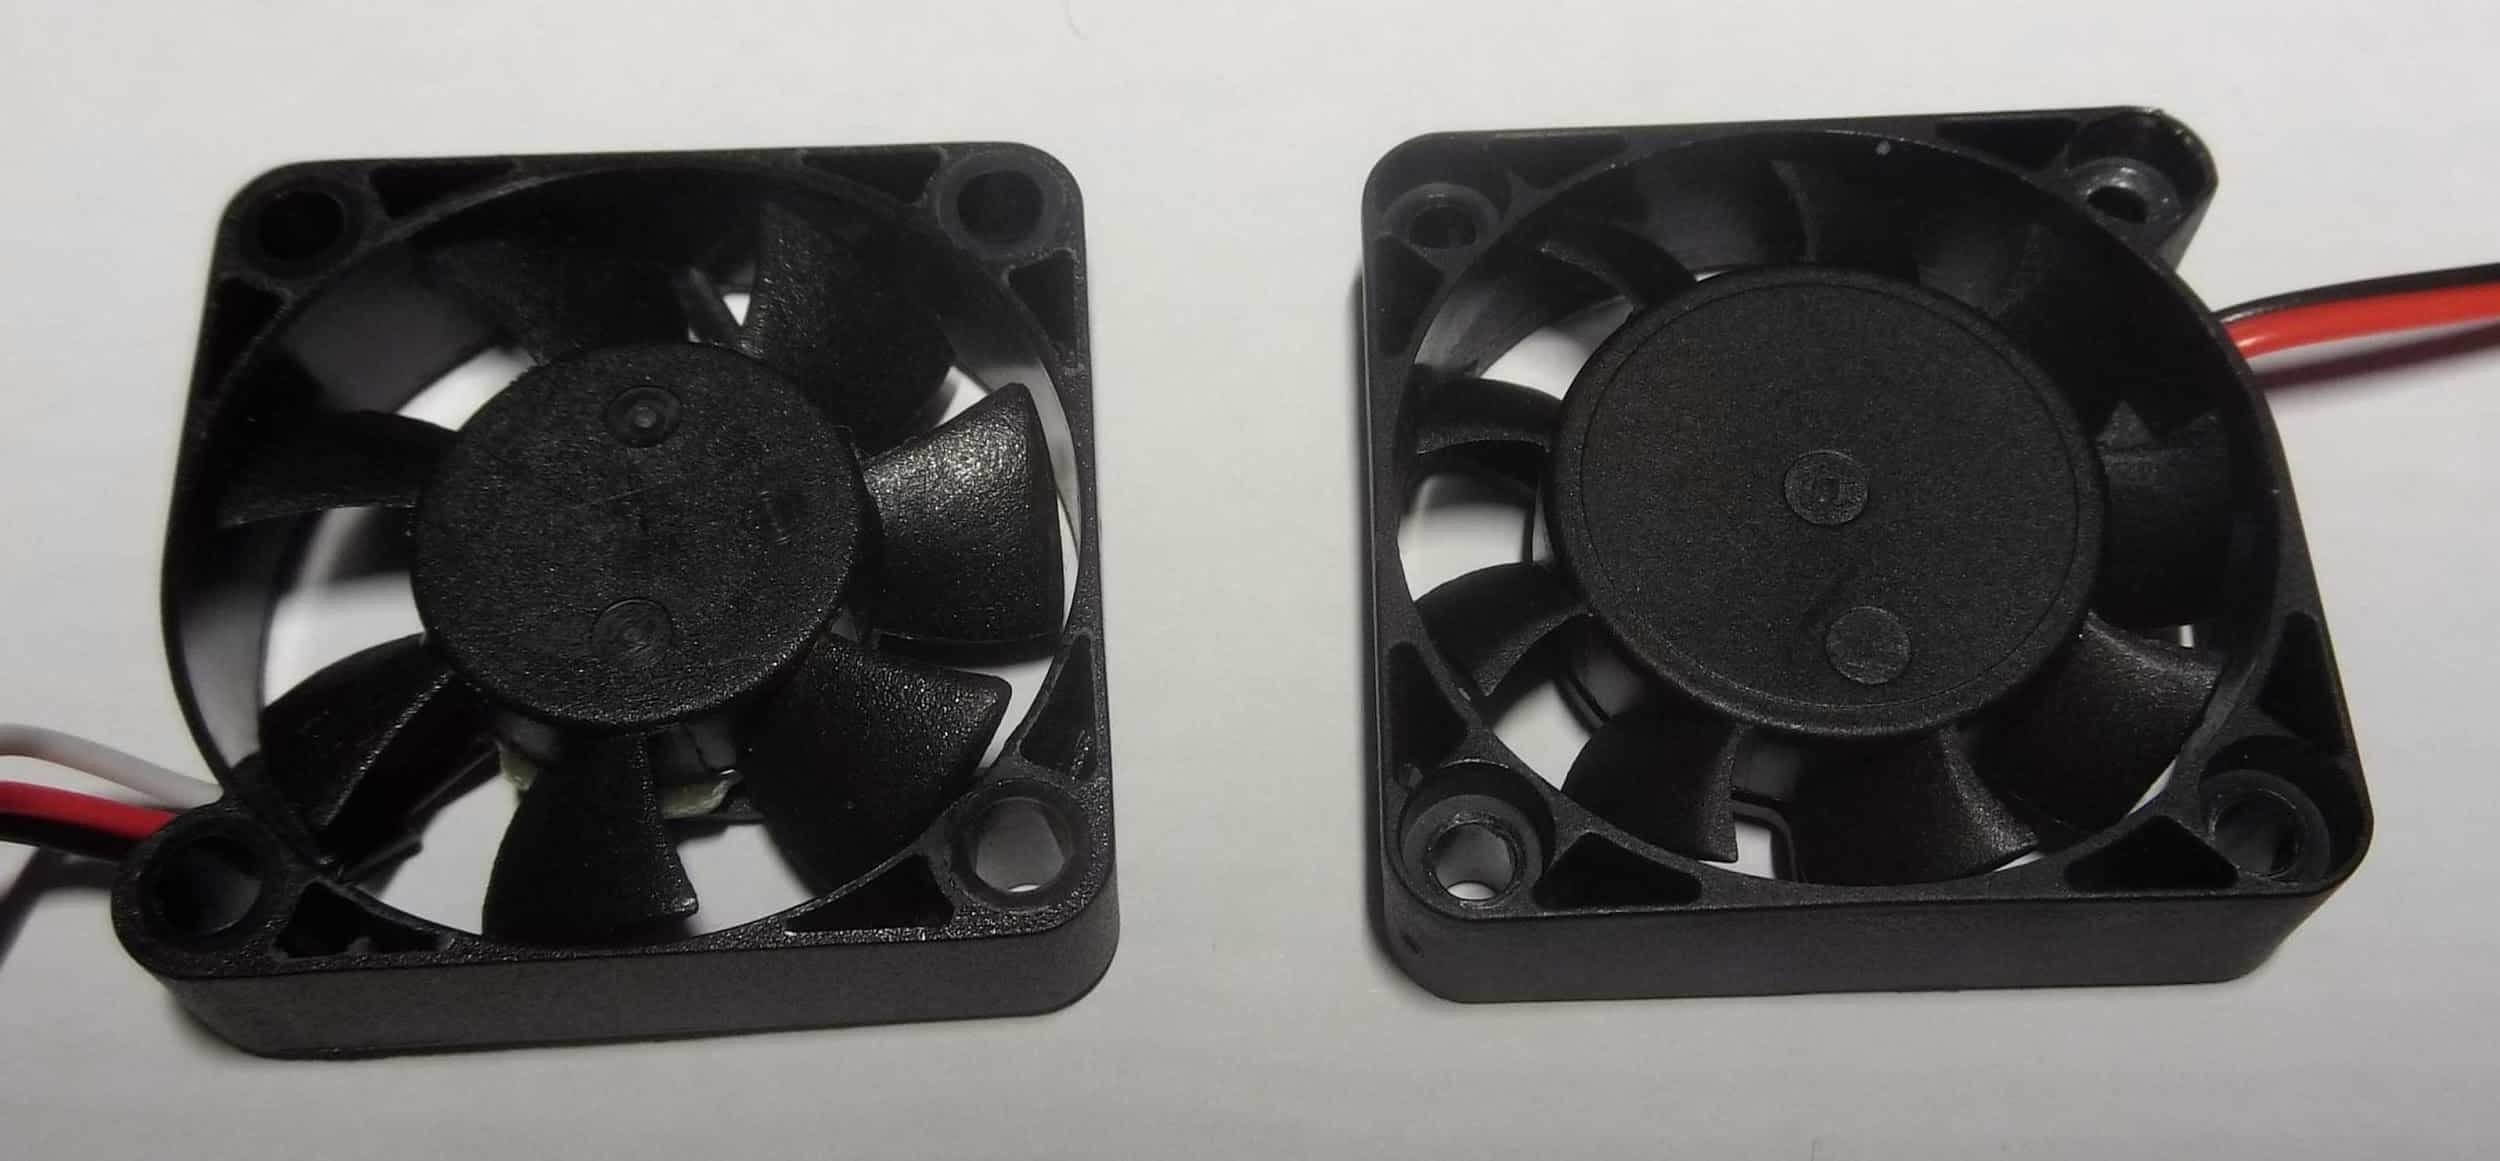
New fan on the left
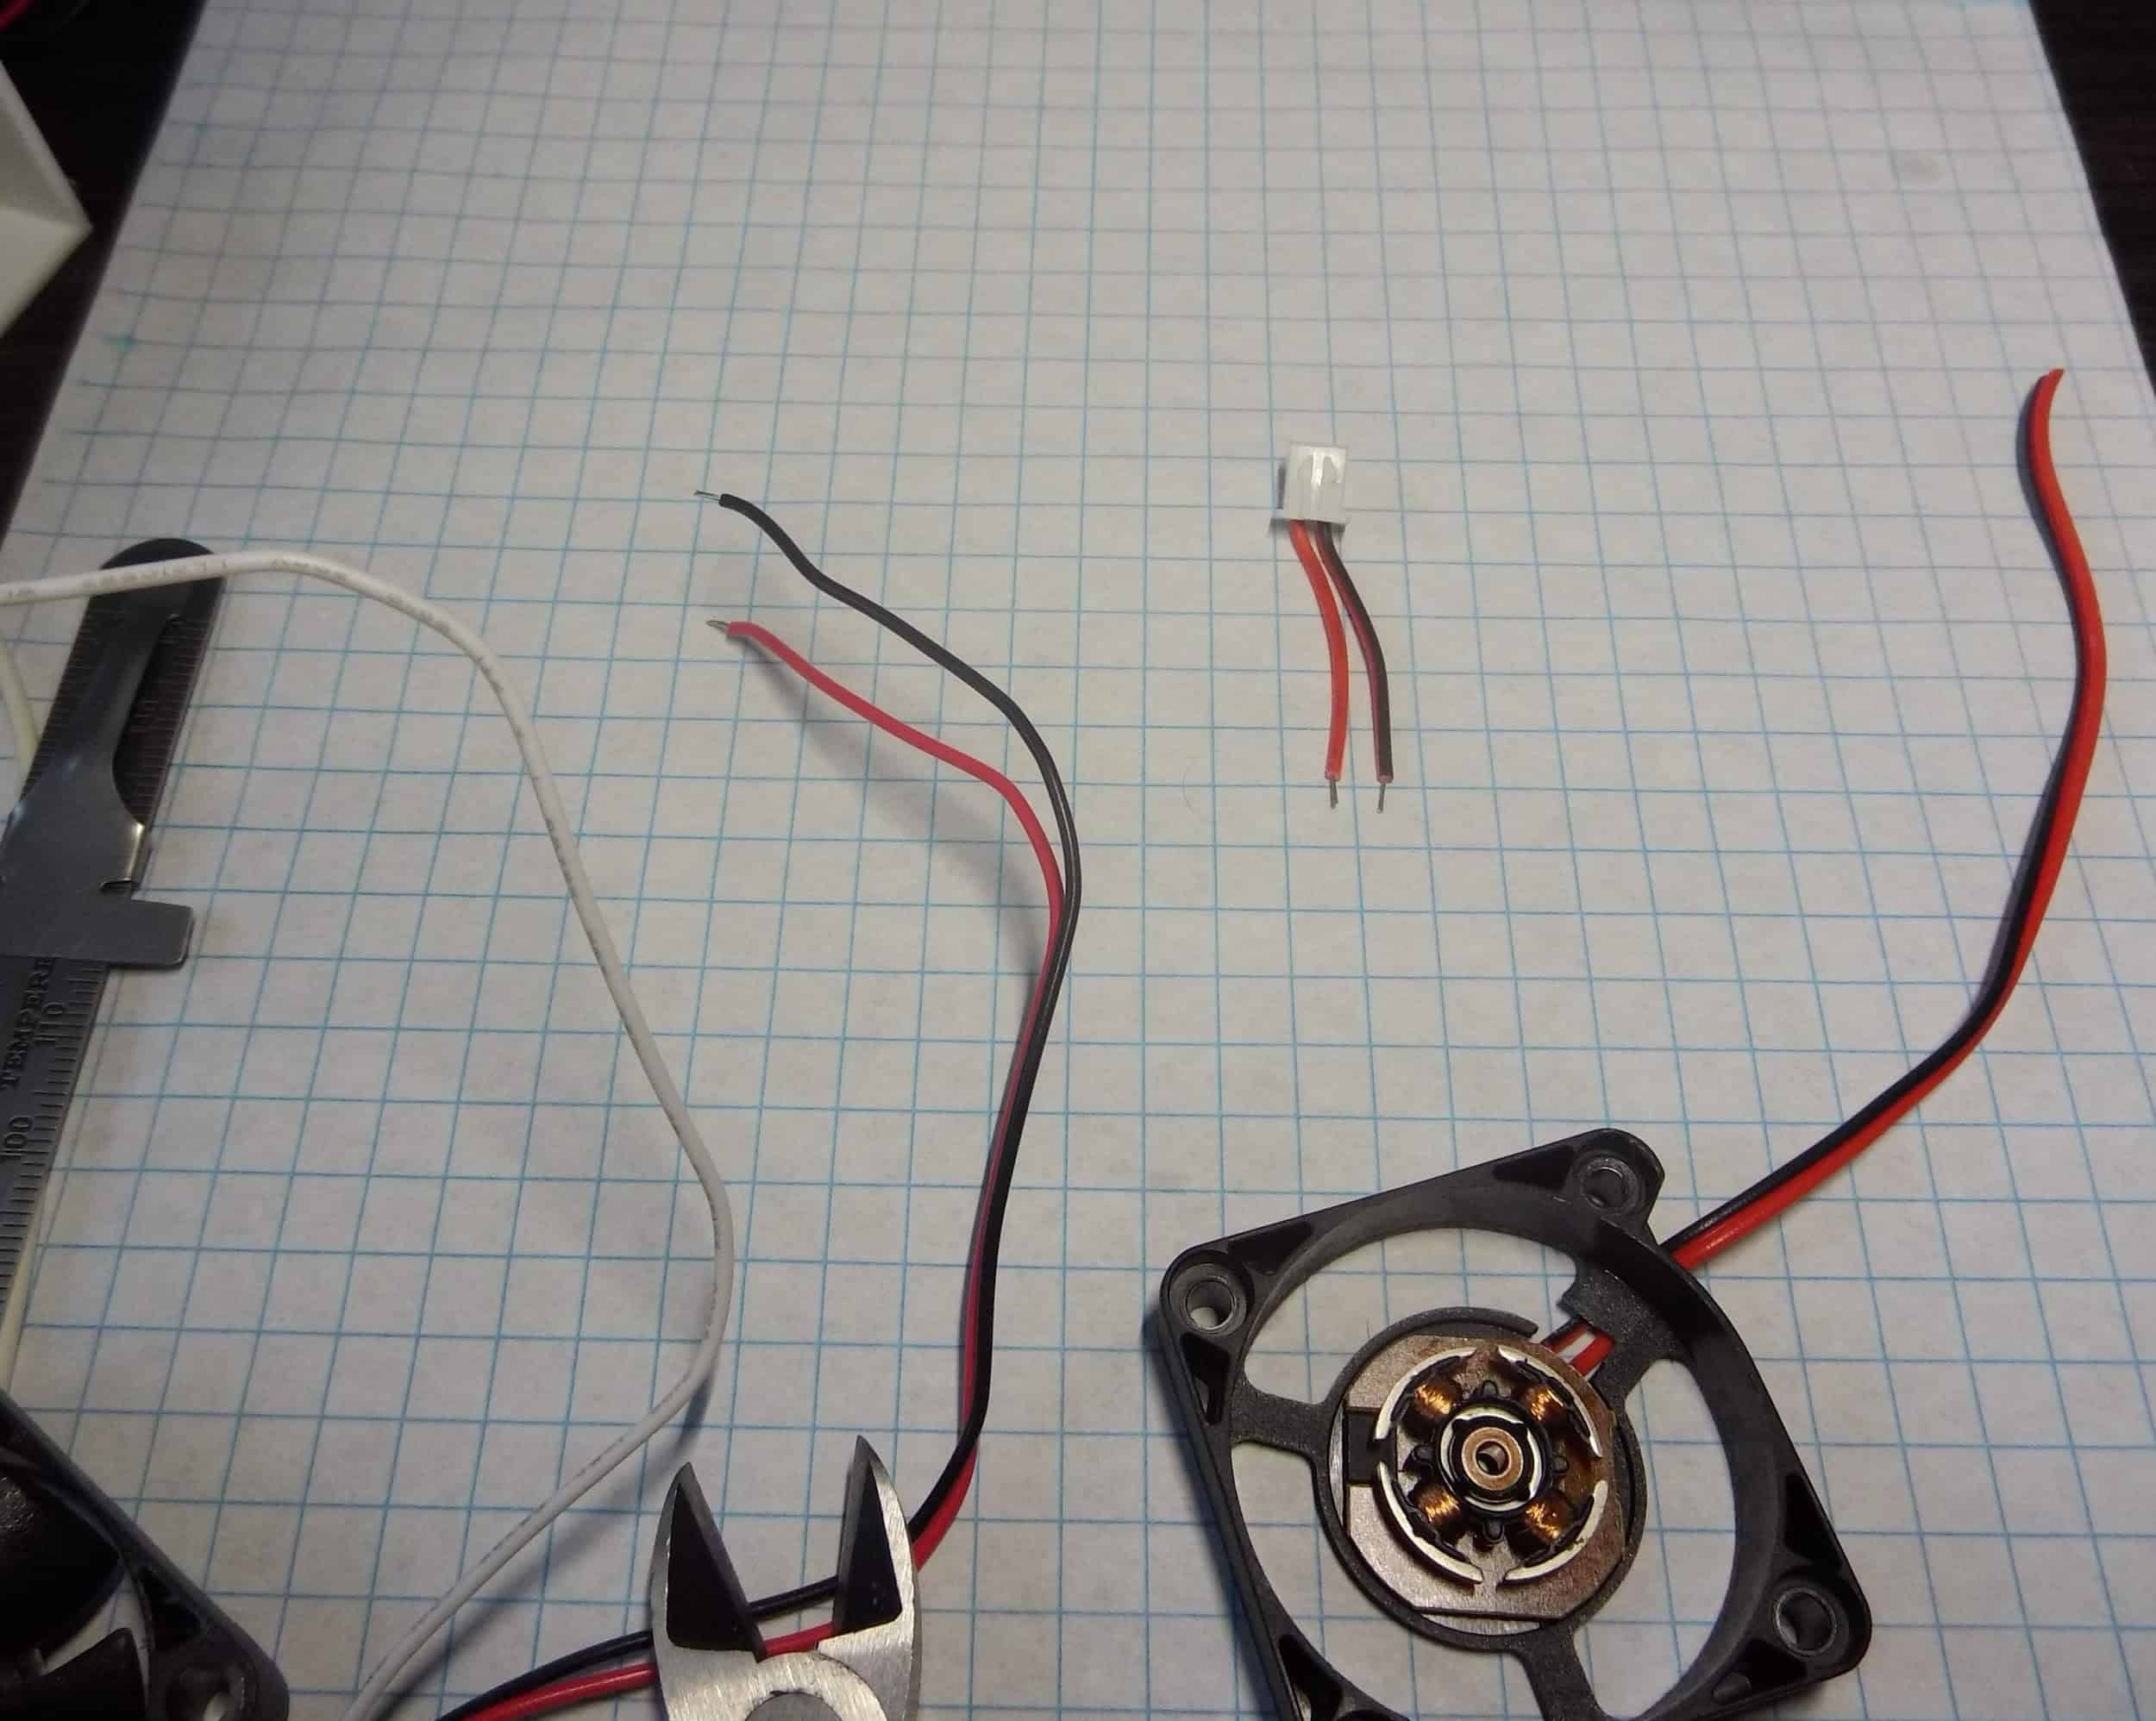
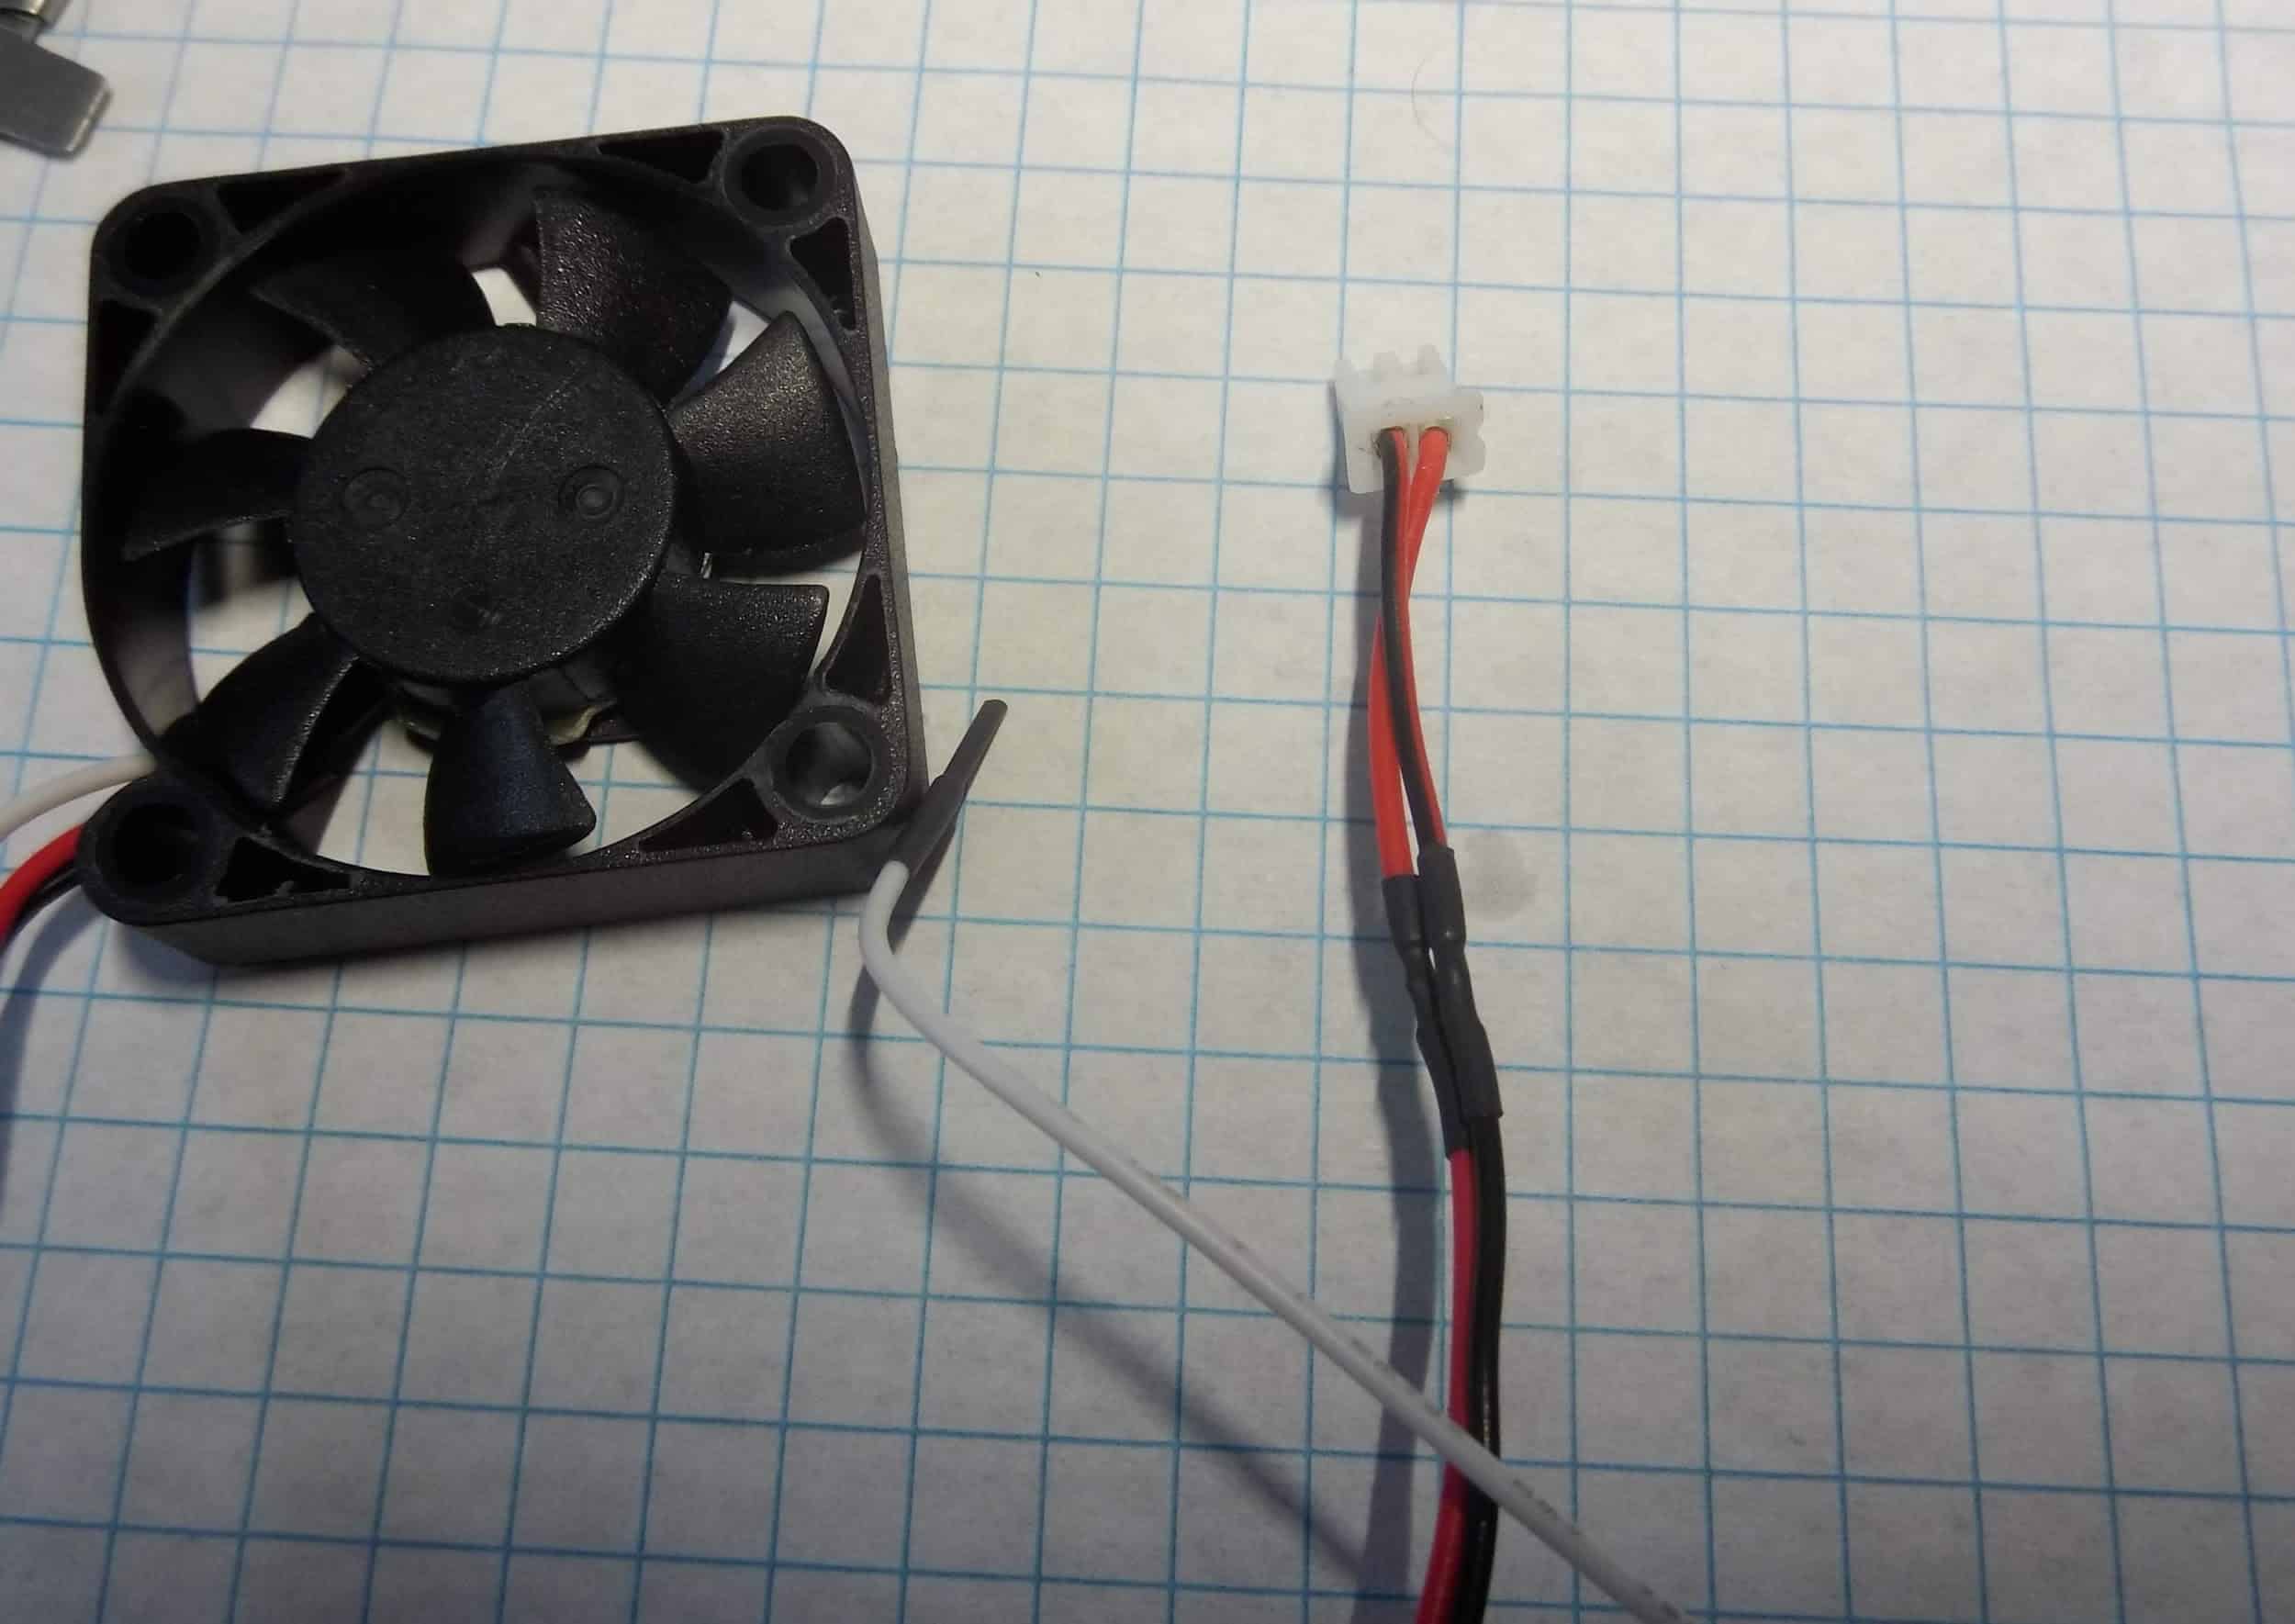
As I mentioned before, to install the new fan I will have to cut the connector off the old one.
I will also shorten the leads on the new one a bit since they’re about twice as long. The leads on the old fan were almost too short, but a lot of excess would just need to be tied up somewhere.
I think I can find a happy medium.
I need to leave enough lead attached to the connector to make it easy to work with. About 30mm should do it.
Then I just need to trim back the insulation on both sides so I can join them. I’ll leave the white “tachometer” lead at its original length since I don’t know what I might use it for yet.
Now I just need to slip some heat shrink over the leads on the fan side and solder them together.
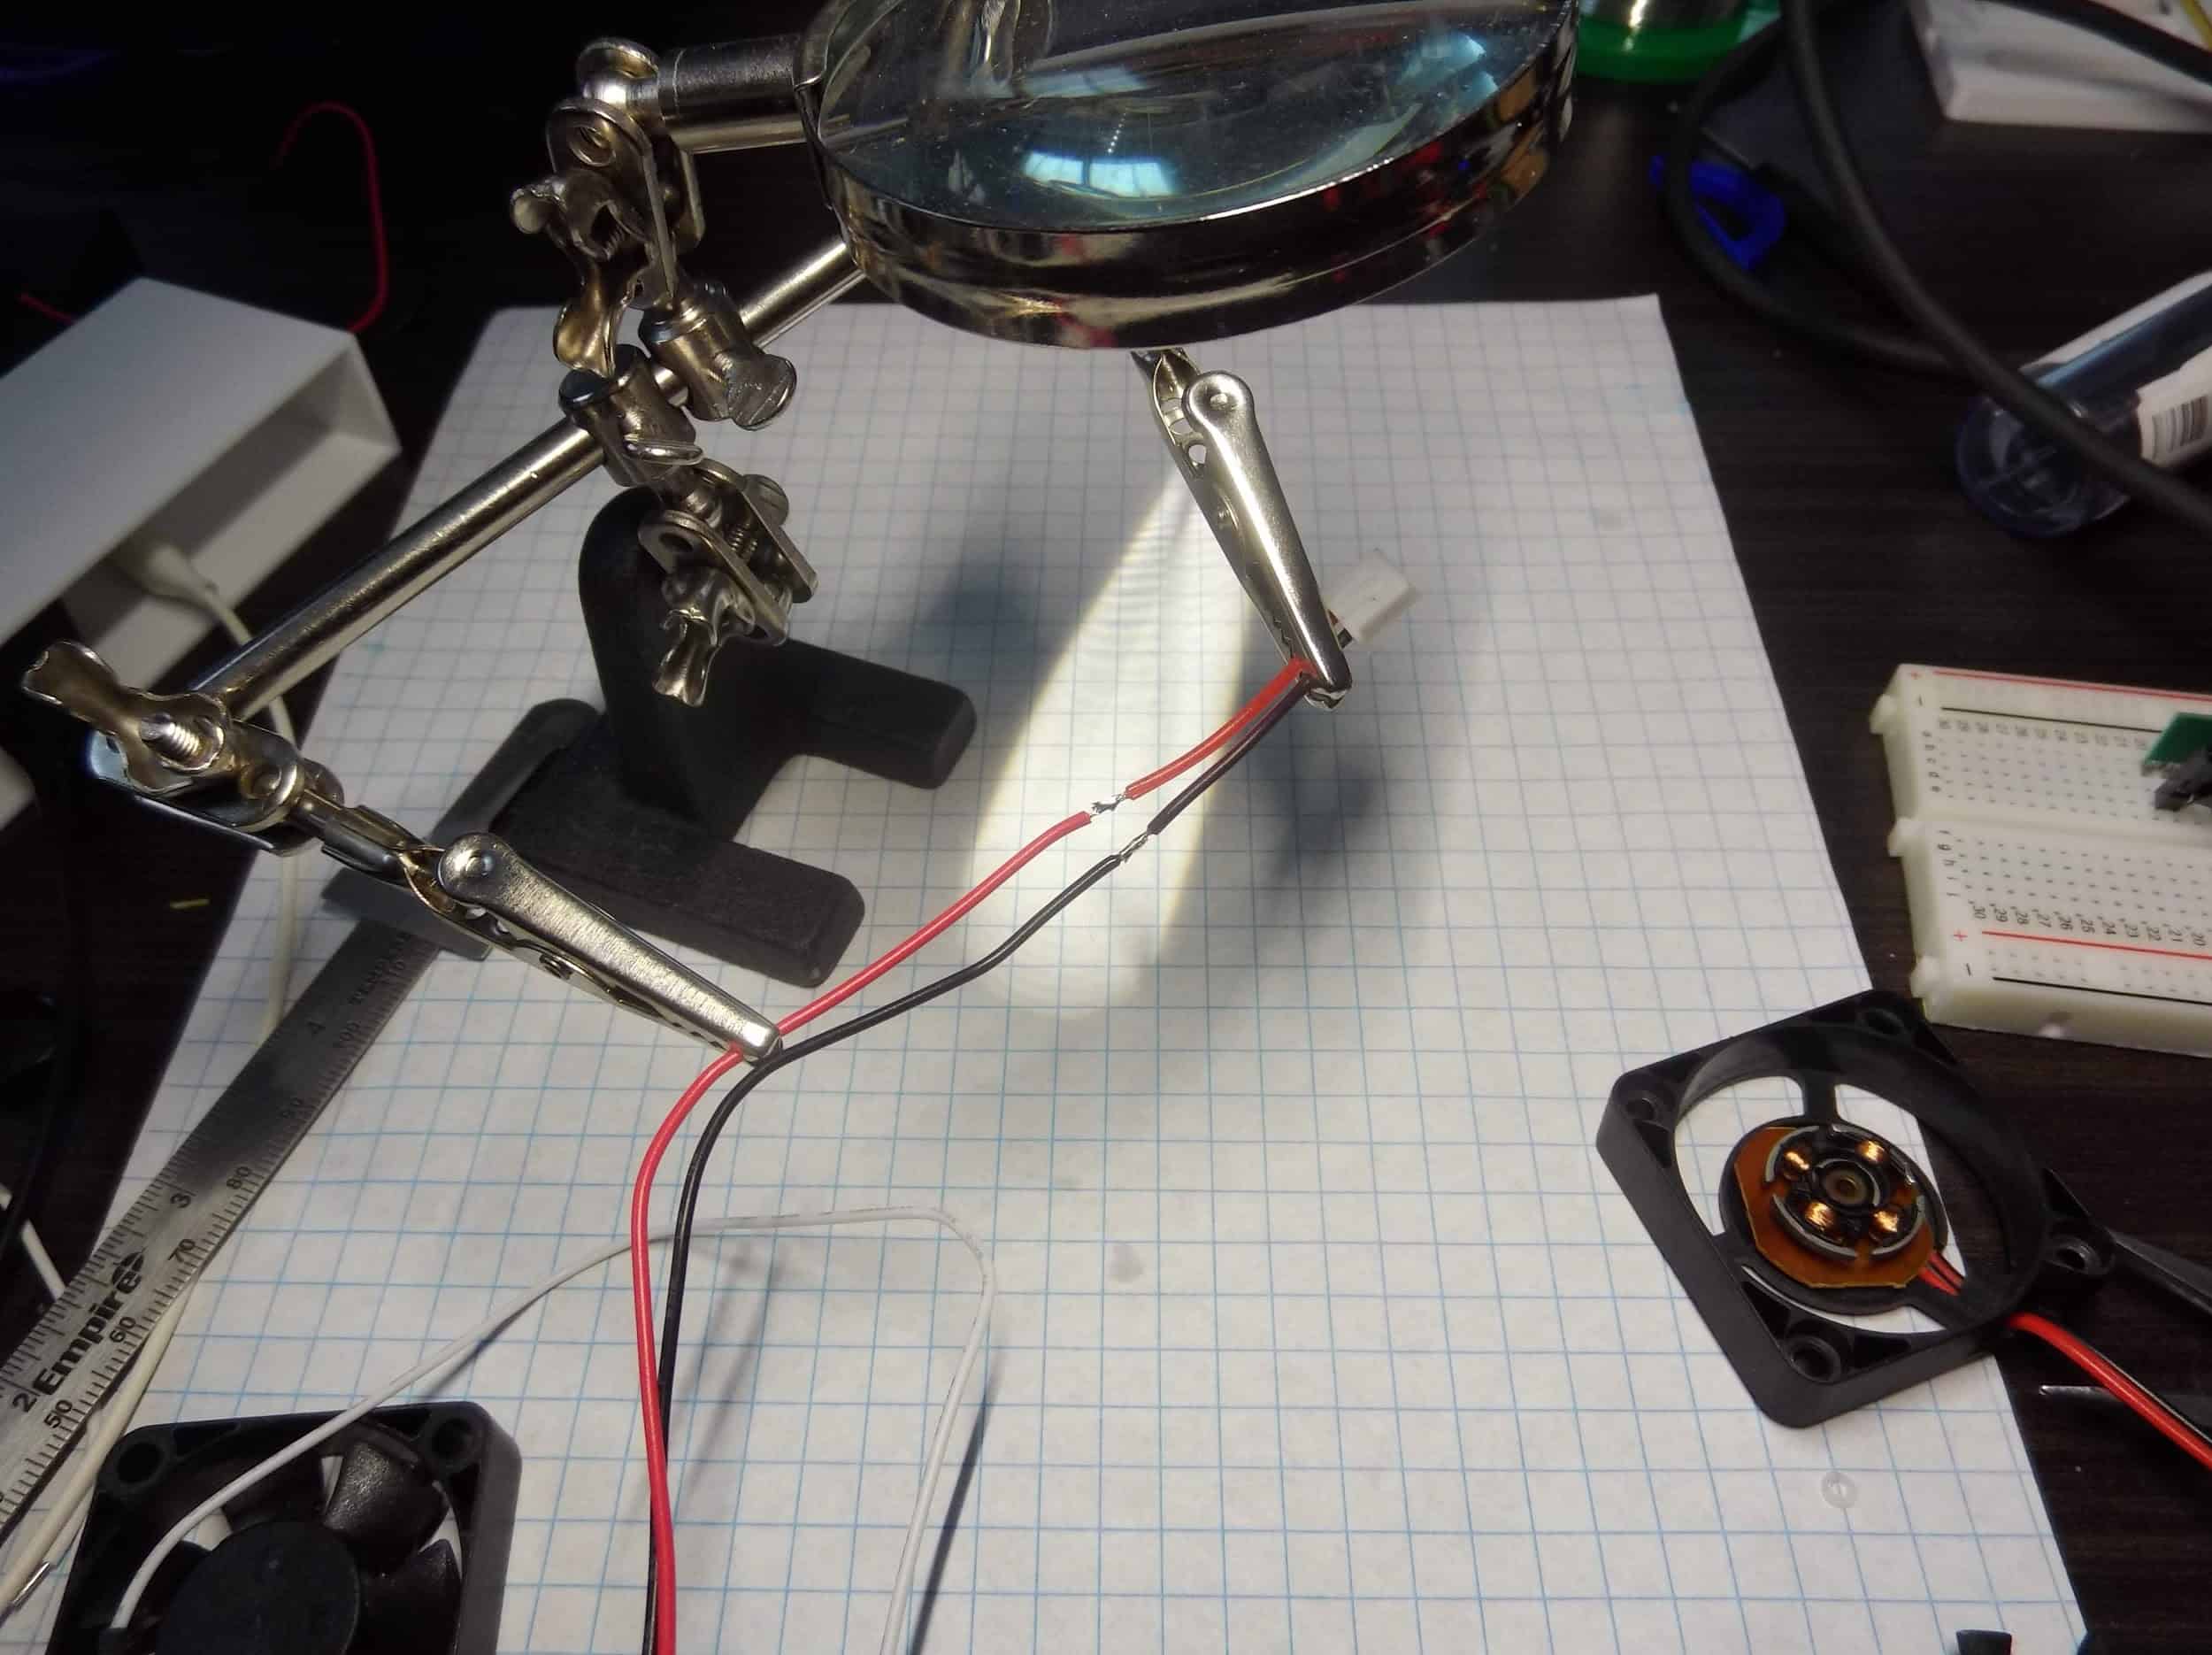
Now just a few seconds under a heat gun tidies everything up nicely. I added some heat shrink to the white lead to cover the exposed end. It can be cut off easily if I decide to use the RPM signal for something.
Now it’s just a matter of threading the new fan leads back to the connector, putting the cover back on, and mounting the fan to the duct.
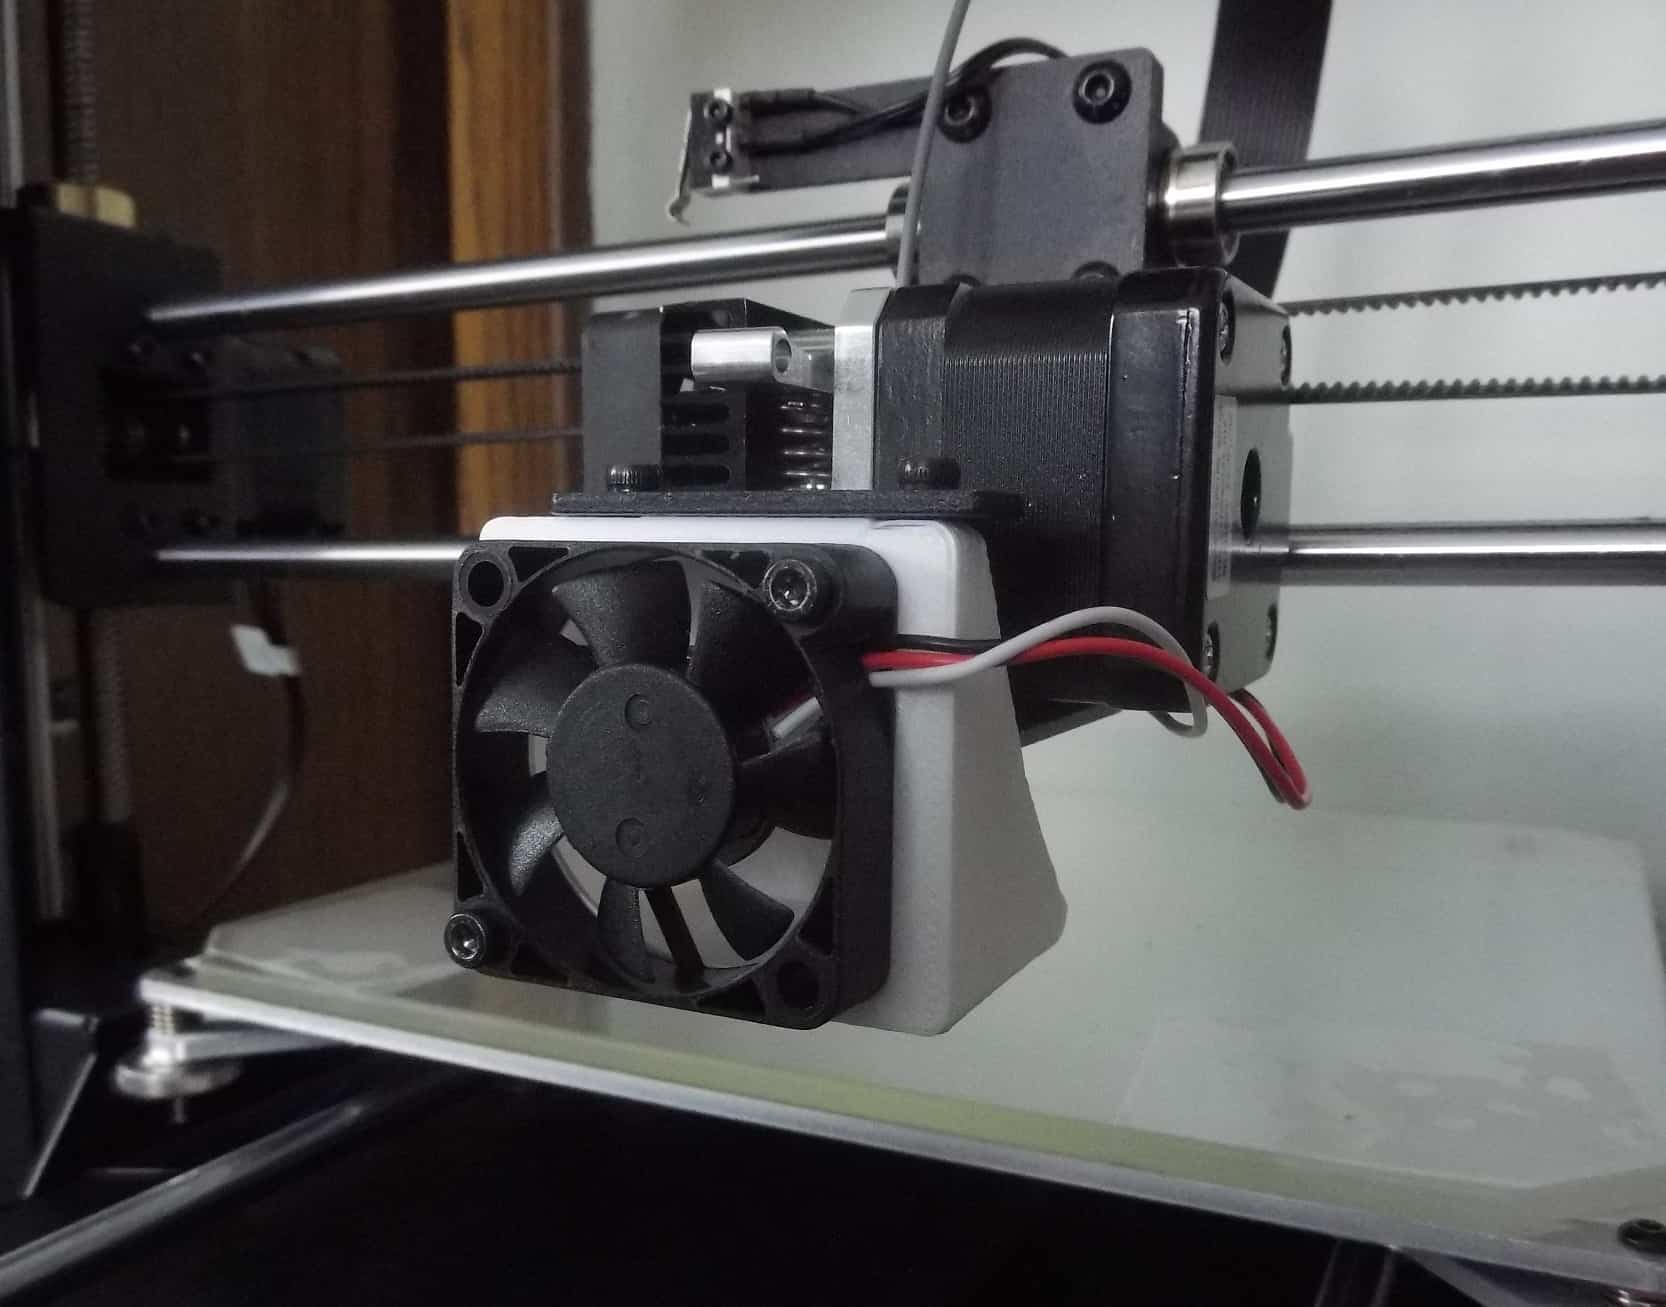
That’s pretty good, but not perfect.
The new fan has a different style of mount holes, so the heads of the mount bolts don’t fit into them. As a result, they’re barely long enough to hold the fan in place. I’ll probably need to replace them to keep the fan mounted securely for the long term.
While I’m at it I’ll buy four bolts instead of the two the printer came with. I’m not sure if they skimped here to save on hardware costs or if it was a manufacturing oversight. Either way, buying two more bolts won’t cost me much.
I will probably also end up modifying the size of the mount holes on my cooling duct so I can get wider bolts that better match the new fan.
A few minutes of design work and about an hour and a half to print the new duct will be well worth it.
The new fan is way quieter than the old one!
Closing Thoughts
One of the best things about hobbyist-grade 3D printers is that they are pretty easy to modify. Most use standardized components that are easy to find replacements for. Also, you usually only need simple, inexpensive tools to work on them.
Because I deal with electronics a lot, I have some specialized tools that make the job easier, but they aren’t strictly necessary. That being said, most are available online for very little money, so don’t be afraid to up your tool game if you think it will make your life easier.
For example, at the time of writing, a set of helping hands like the ones I use to hold wires while soldering is available on Amazon for less than seven dollars. It sure beats other methods!
And with that, it’s time to fire the printer back up. Those stencils aren’t going to print themselves! But that’s another story…