With the recent release of the Ender 5, you might be wondering which you should buy. Should you get the Ender 3, or spend the extra $120 – $150 for the ender 5? Depending on current pricing, this difference is almost the cost of another Ender 3, so it’s worth investigating. Read on, and we’ll go through it.
What Do These Numbers Mean?
Creality’s Ender series of printers have evolved over time, with new models bringing incremental improvements. That being said, a higher number doesn’t necessarily mean a better printer. For example: while the Ender 3 is a significant upgrade over the minimalist Ender 2, the Ender 4 has more advanced features than the Ender 5 (and costs a bit more).
This can be pretty confusing, which is why research is needed before buying a 3D printer, and why we spend so much time writing about them. We want to help you make the best informed decision you can. So let’s get on with it!
Specifications
The Ender 3 is a cartesian FFF (FDM) printer with an available build volume of 220x220x250mm. This means it’s capable of producing objects that are up to 220mm in diameter, and up to 250mm tall. Depending on who you ask, this size is average, or a little above average for current hobbyist 3D printers.
If you compare the build volume of the Ender 3 to the Ender 5, the only major is the build height. The beds are the same size. So unless you really need an additional 50mm of build height, the Ender 5 doesn’t offer any benefits there.
The Ender 3, like most Creality printers, uses a Bowden style extruder. So it is possible that it won’t handle every type of filament a direct drive would, but since we first assembled ours, we’ve printed in PLA (rigid) and TPU (flexible) without any issues. This extruder uses 1.75mm filament.
The Ender 3 has a heated bed capable of about 110 degrees celsius, meaning it will print with ABS filament reliably, assuming you’re set up to deal with the fumes.
Axis movement is provided by stepper motors with toothed belts for the X and Y axes, and a stepper motor with a threaded rod for the Z-axis.
Some Background
I’ve been in the 3D printing game for a while. If you’ve read any of my other posts, you know my current printer is a Monoprice Maker Select Plus. It’s a good printer, but the technology has improved some since I bought it. So when our colleague, Dave, said he was interested in getting into 3D printing we naturally wanted to go with something newer.
Since this is a review of the Ender 3, it should come as no surprise that it was our choice. We chose it because it has decent features at an affordable price. It also has a huge online community of users that are willing to answer questions and help out. Never underestimate the power of community support.
We also chose the Ender 3 because it was entirely new to us. This was Dave’s first 3D printer, and I have a different brand. Neither of us had ever touched a Creality 3D printer before, so it allowed us to go into the review process with no more information about it than anyone else. This allowed us to make an objective assessment of the printer. Our preparation beforehand only involved a little bit of searching online for things to look out for during the process – something anyone could (and should!) do. There are definitely a couple of things to keep in mind while building the Ender 3, but we’ll get to that.
First Impressions
When the box first arrived to 3D Printer Power headquarters, Dave and I were surprised by how small it was. Creality definitely put some thought into the packaging. Everything was neatly packed, and well protected by black foam. We took out time pulling everything out of all the nooks and crannies in the packaging, making sure we had found all the parts.
It is a little surprising how many pieces we ended up laying out on our build table. Depending on where you buy it from, the Ender 3 might be advertised as a ‘kit,’ ‘partially-assembled,’ or some variation thereof. Regardless of how it’s described, the Ender 3 will require some work to put together.
What’s in the Box?
The base of the Ender 3 comes pre-assembled with the build plate already mounted to the Y-axis. The plate shipped with a removable, flexible build surface held on with binder clips. It’s similar to BuildTak, but it’s hard to know if it will hold up as well as the real stuff.
All the other pieces are packed in the foam around the base of the printer. The largest individual pieces are for the X-axis and the gantry that goes over it. We laid them all out on a table to take inventory.
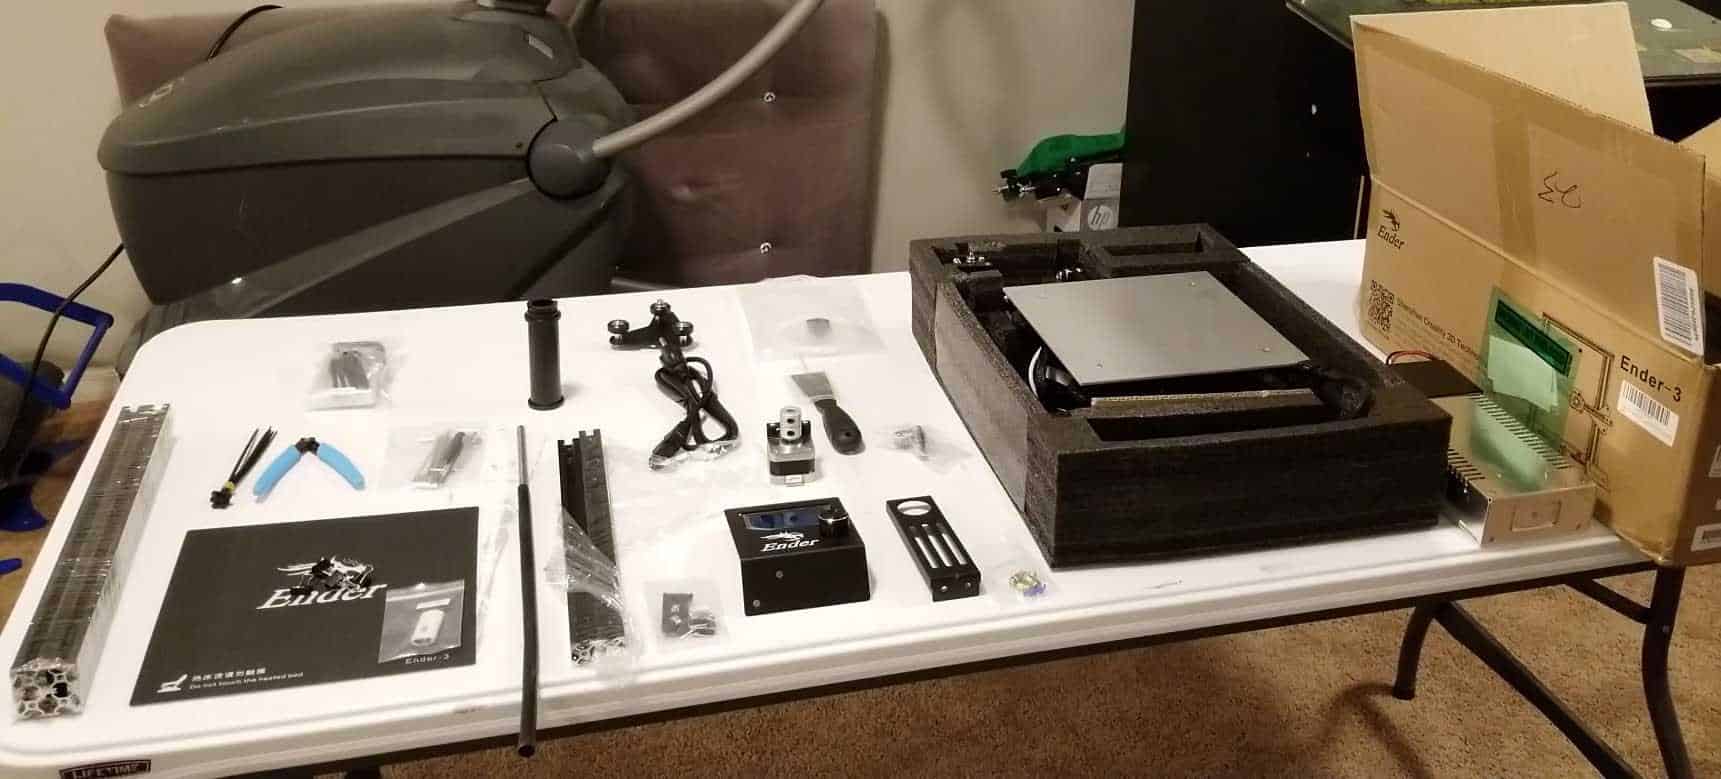
Mostly unboxed
There is one thing I want to cover here that I don’t think Creality gets enough credit for: the included tools. Now, I have a lot of tools. My collection has grown to the point where I probably have everything I would need to take apart my entire car and put it back together. But most people are not like me. Most people only have simple hand tools they use around their house, because that’s all they need. If you buy and Ender 3, none of that matters.
Included in the box with the printer is every tool you will need to put it together. That actually isn’t very many tools, but that’s not the point. You need exactly zero additional items. That’s kind of a big deal because it means this printer is very accessible. If you own a computer, you can print with the Ender 3.
Assembly
The instructions included with the Ender 3 are in the form of numbered pictures. If you’ve ever put together a piece of furniture that came flat-packed, it isn’t that different. One issue I did run into is figuring out what prospective the instructions were using for some of the components. I ended up turning them around in my hands a bit to get them to match the orientation the instructions were using.
Overall, assembly was relatively easy. Having two people did help eliminate mistakes, so invite a friend over on build day! That being said, there are some specific things to look out for when assembling the Ender 3.
Not All Revisions Are Created Equal
There appear to be three distinct revisions of the Ender 3. The exact mechanical differences between them aren’t documented very well (at least not that I could find), but the revision you get may affect some of the assembly process.
Dave purchased his Ender 3 from Amazon(link), and he received a third revision model. If you buy one from a different vendor, during a flash sale for instance, it’s impossible to know what revision you will get. They all work, but based on feedback I received from a couple of friends who have them, assembly and tuning of an older revision is harder.
One example of this is the Z-axis limit switch. We had a little difficulty getting it positioned correctly. The instructions were not overly clear about where you were supposed to measure from to set it to the right height. However, on the newest revision, the limit switch has a lip on the bottom of the molding that sits against the printer’s base, making measurement unnecessary.
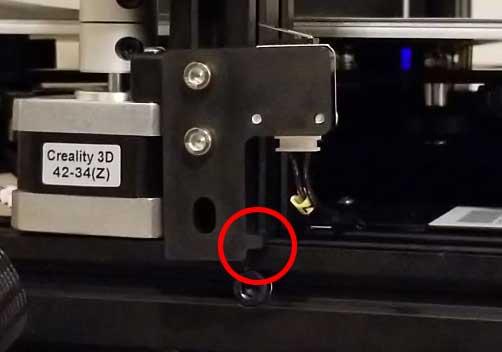
This little lip rests on the base. No need to measure!
Physics Will Always Win
Another thing you need to pay attention to when assembling the Ender 3 is the adjustment of the eccentric nuts. These look like an ordinary nut on the outside, but the center hole is offset so when you turn it, the shaft that it is on is moved in that same direction. The Ender 3 uses these to set the tension on the wheels the X and Z axes move on. If you don’t have them tight enough the axis will wobble, but if they’re too tight the wheels might bind.
Also, when you slide the X-axis onto the uprights, they might pull inward a little bit, making it difficult to attach the top of the gantry. This will just take a little pulling, as you have to get the outer wheels to compress a little bit to be able to put the screws into the top of the gantry. Having two people helped a lot here.
What’s that Wobble?
Once the printer was fully assembled, Dave and I moved it to the countertop he’s going to use it on so we could power it up and level the bed. We noticed immediately that the printer wobbled slightly from one corner to the other. This is pretty bad, since you want it to sit as motionless as possible to get good prints. This wobble isn’t a problem with the printer, it’s almost perfectly flat on the bottom. It’s a problem with Dave’s countertop. An ordinary countertop isn’t perfectly flat, but you won’t notice until you put a flat rigid object, like a 3D printer, on top of it. The printer will wobble because it’s flatter than the surface it’s sitting on. We had to shim under one corner to take the wobble out.
There is a lot of talk in the 3D printer community about leveling your printer. It isn’t necessary to get the printer exactly level as long as it can’t shift or wobble. Obviously you don’t want the printer sitting at some crazy angle, because it will over-work the motors, but as long as everything is put together tightly, a non-perfectly level printer won’t hurt your print quality.
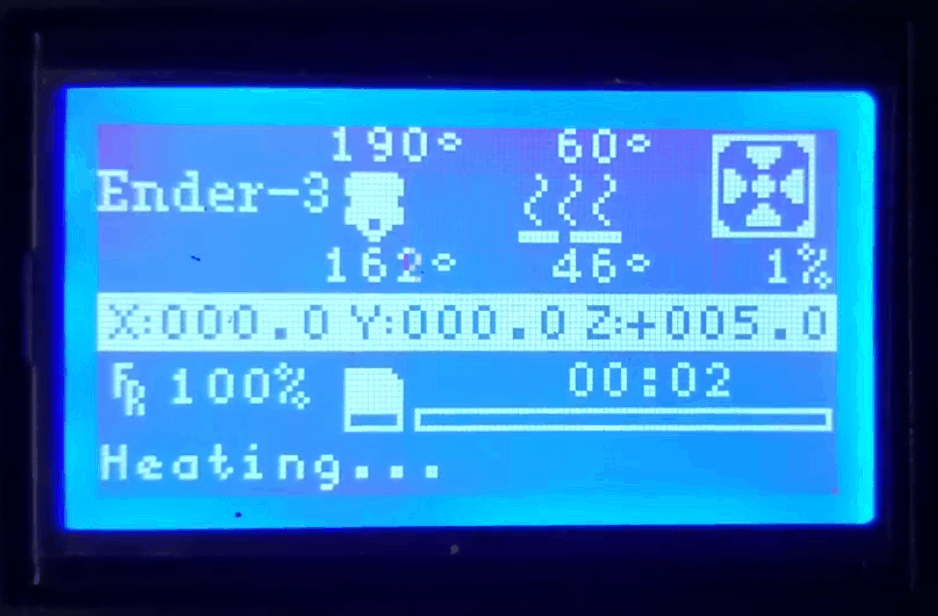
Powering Up and Bed Leveling
Once we had the printer shimmed, we powered it up. The on-screen menus aren’t very intuitive, but there also aren’t that many options, so it’s hard to get lost. The dial is a little finicky at times, but once you’re through the initial setup you won’t have to navigate as many menus, and if you end up driving the printer from a computer instead of the SD card, you won’t need the on-screen options much at all.
Note: if your Ender 3 won’t power up, check the switch on the power supply. The position needs to match the power specifications of your location. For the United States, the switch should be in the 115 volt position. Our printer turned on once for us with the wrong power setting, but would not again. It was an easy fix once we remembered to check that.
We used the on-screen menus to home the bed, then proceeded to level it using the old school paper method. The Ender 3 doesn’t have automatic bed leveling, but it does include a routine that moves the print head to different parts of the bed so you can check the level there. We didn’t use this. It’s just as easy to just home the Z-axis, then turn the printer off and move the print head around by hand – a method I’ve used for years with my Maker Select Plus.
The paper method is simply moving the head around with a piece of printer paper on top of the print bed. You want the tip of the extruder to just scrape the paper without digging in. The Ender 3’s large leveling wheels make this process pretty easy.
Note: the print bed may be warped a little, making it impossible to get a perfect level in every location. That’s ok. Dave found that his Ender 3’s bed evened out a little over time. Until then we were just careful where we placed our prints on the bed while slicing them. Usually this means keeping them centered on the build plate, which most slicers do by default. That being said, bed warping is a common issue on cartesian 3D printers. If you continue to have problems, you may want to look into a replacement bed or a glass bed upgrade like I did with my Maker Select Plus.
First Print
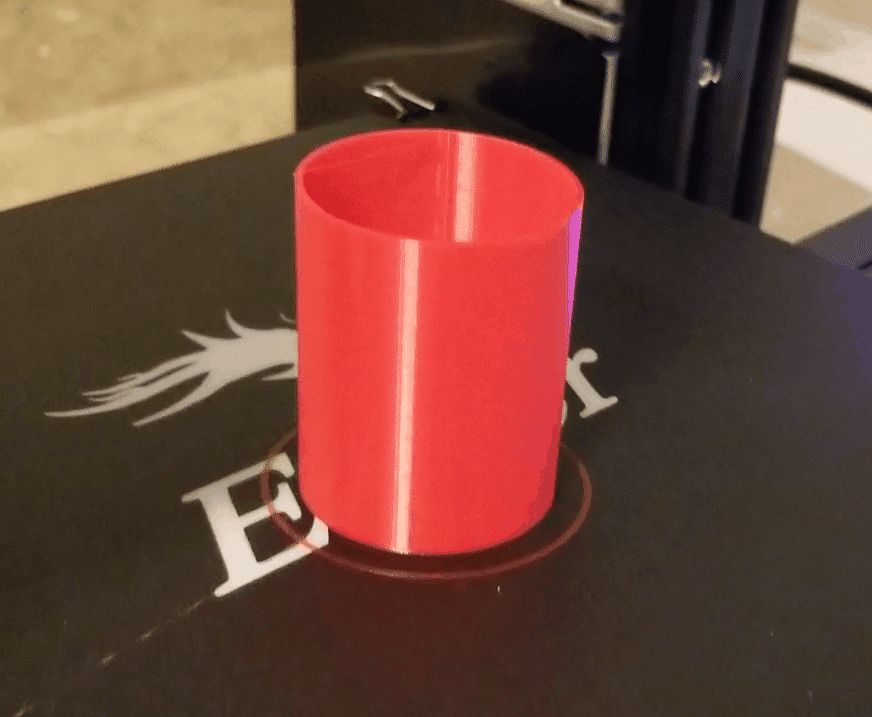
To test out the Ender 3, Dave picked up some Hatchbox Red PLA filament. I sliced a model in Cura with the Ender 3 profile, so we just had to copy it to the micro SD card and load it up in the print menu.
It lives!
The object we printed first was just a simple hollow cylinder. I chose this shape to check the printer’s dimensional accuracy.
Are Your Belts Tight?
Speaking with a couple of friends who own Ender 3s, one of the issues they ran into when they first started printing was oddly shaped circles.
When circles aren’t circular, there is problem with the dimensional accuracy on the X and/or Y axes of the printer. On the Ender 3, this type of problem is usually caused by the X or Y axis belts either being too loose, or too tight.

When Dave and I assembled his Ender 3, we were careful to make sure the belt tensions felt right. The Y-axis comes pre-assembled, so just make sure to check that the belt doesn’t feel loose. You have to assemble the X-axis yourself, so be sure to follow the instructions for tightening the belt carefully. It might take a little bit of trial and error, but at least you’ll know what to look for if your prints have issues.
The Verdict
The first print turned out beautifully. It didn’t show any sign of issues on any of the axes. There’s just one hint of stringing on the top layer, but it really couldn’t have been much better.
After we had validated the accuracy, Dave printed off the dog that Creality includes on the SD card. It also turned out very nicely.
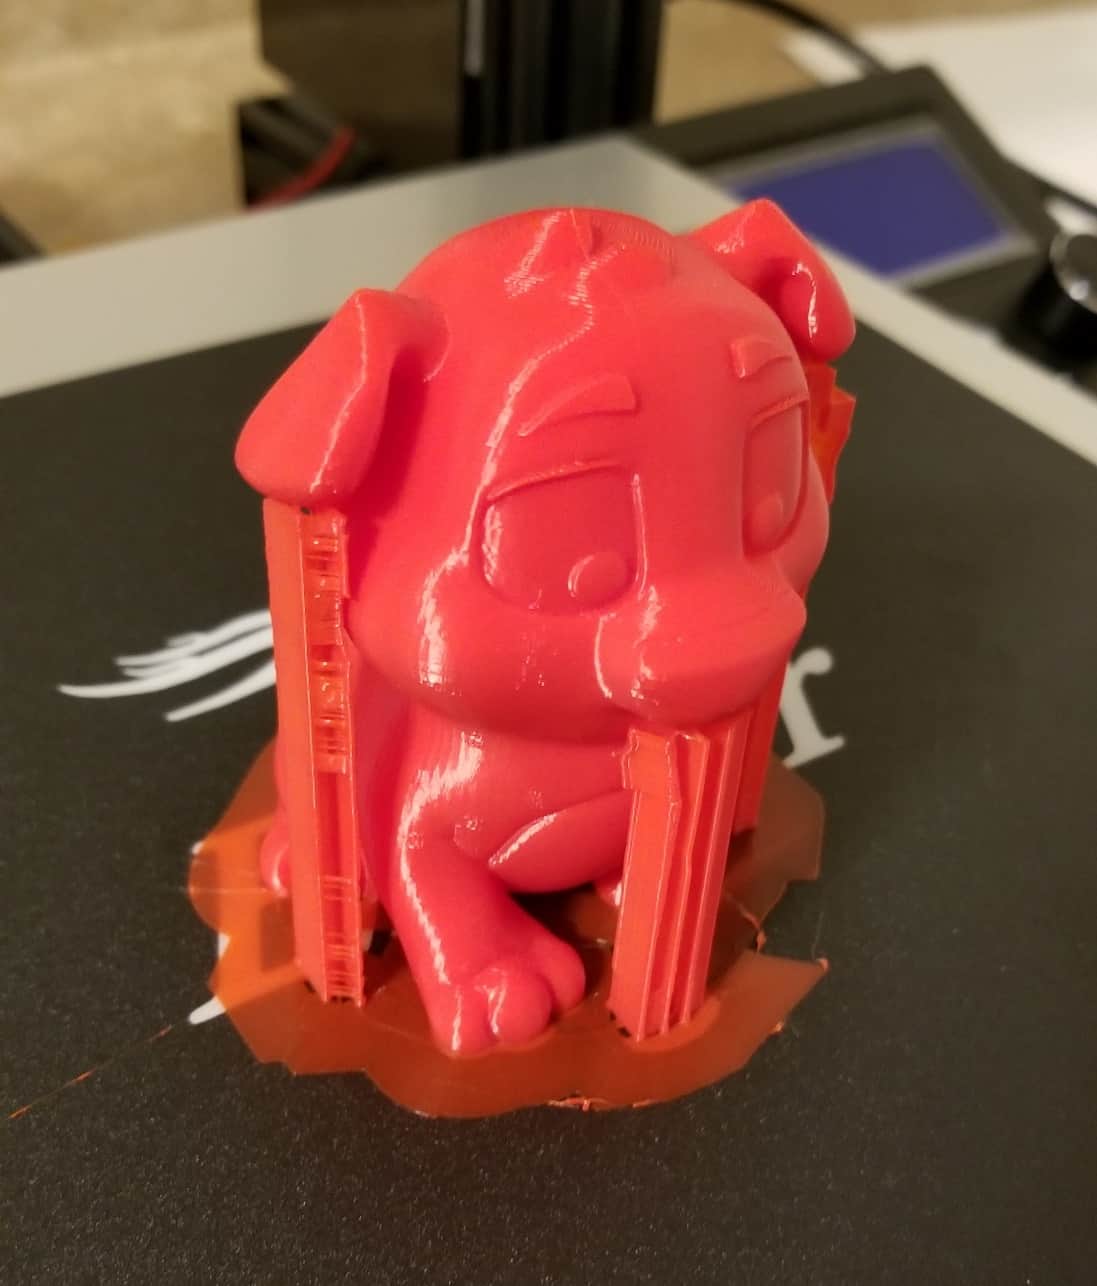
The edges are smooth, with just a few tiny rough patches, and the overhangs and details are crisp. For a newly assembled printer with no tuning whatsoever, these results are fantastic!
One negative we noted on the Ender 3 is the noise. Depending on the surface it’s sitting on, the stepper motors can be pretty loud while printing. It won’t clear out a room, but definitely don’t sit right next to it while it’s running, or it might drive you crazy. There are motor damper kits available for it, so we might try some eventually and see how well they work.
Final Words
The results speak for themselves. I could go on about more of the details, but there’s really no need. For a printer in the $200 – $250 price range, the Creality Ender 3 produces terrific prints. For any other printer manufacturer, this is the one to beat.
Pros:
Inexpensive (in 3D printer terms)
Great quality prints out of the box
Decent sized build volume
Good community support (many forums and groups where you can ask questions)
Includes all required tools in the box
Cons:
A little noisy
Assembly takes some time and isn’t always intuitive
If you are comfortable spending a couple of hours assembling the Ender 3, and it’s specifications meet your needs, it is the one to buy. If you combine the fantastic print quality with the huge community support it receives, it just can’t be beat right now. For us here at 3D Printer Power, the Ender 3 is a recommended buy.