Have you thought about a 3D printer cooling fan duct when planning your 3D printer projects? If not, you could be making a big mistake.
As a new hobbyist doing some 3D print quality troubleshooting you need to pay attention to this. Many seemingly unrelated quality issues may come back to your 3D printers cooling fan duct. Luckily you have a 3D Printer, and the means to solve your own problem quickly, and easily. Let me walk you through how I discovered this problem and solved it.
3D print quality troubleshooting 101 – Have a problem
I “discovered” this problem, and the solution, when I was printing some terrain for a D&D friend of mine. The part I was printing was the doorway from an interlocking wall set I found at Thingiverse:

The initial wall prints looked great, but when I tried to print the doorway things started to go wrong. It has large overhangs that my printer just wasn’t handling very well. The edges started to curl, and eventually, the hot end hit one of them and knocked the unfinished part off the print bed. At this point, it started spewing the dreaded plastic spaghetti and I canceled the print.
That’s how I found the problem, but what about the solution?
Is this a common 3D printing problem and why?
Is the cooling fan duct a common problem? More than you think. Why is that? Here are my 2 cents on the topic.
The current market for 3D printers has been a huge benefit to hobbyists everywhere. For a few hundred dollars (or less) you can buy any number of different models and be cranking out decent quality prints within hours of opening the box. However, when it comes to inexpensive 3D printers, you have to keep in mind that not everything is going to be perfect.
When manufacturers design a device to hit a certain price point some compromises always have to be made. What’s the likelihood you’re going to come across a review that tells you not to buy a printer because of a cooling fan duct? I didn’t even realize it was a problem for a long time.
I’ve been happy with my prints, and with the amount I spent on my printer. Even finding this solution was pretty fun.
How do you diagnose the problem?
As discussed manufacturers often compromise on how quickly the printer cools extruded filament. For simple prints that have a lot of bed contact, it may not be an issue. Once you move into more complex designs you’ll see some problems. Inadequate filament cooling can cause a decent 3D printer to give a weak performance.
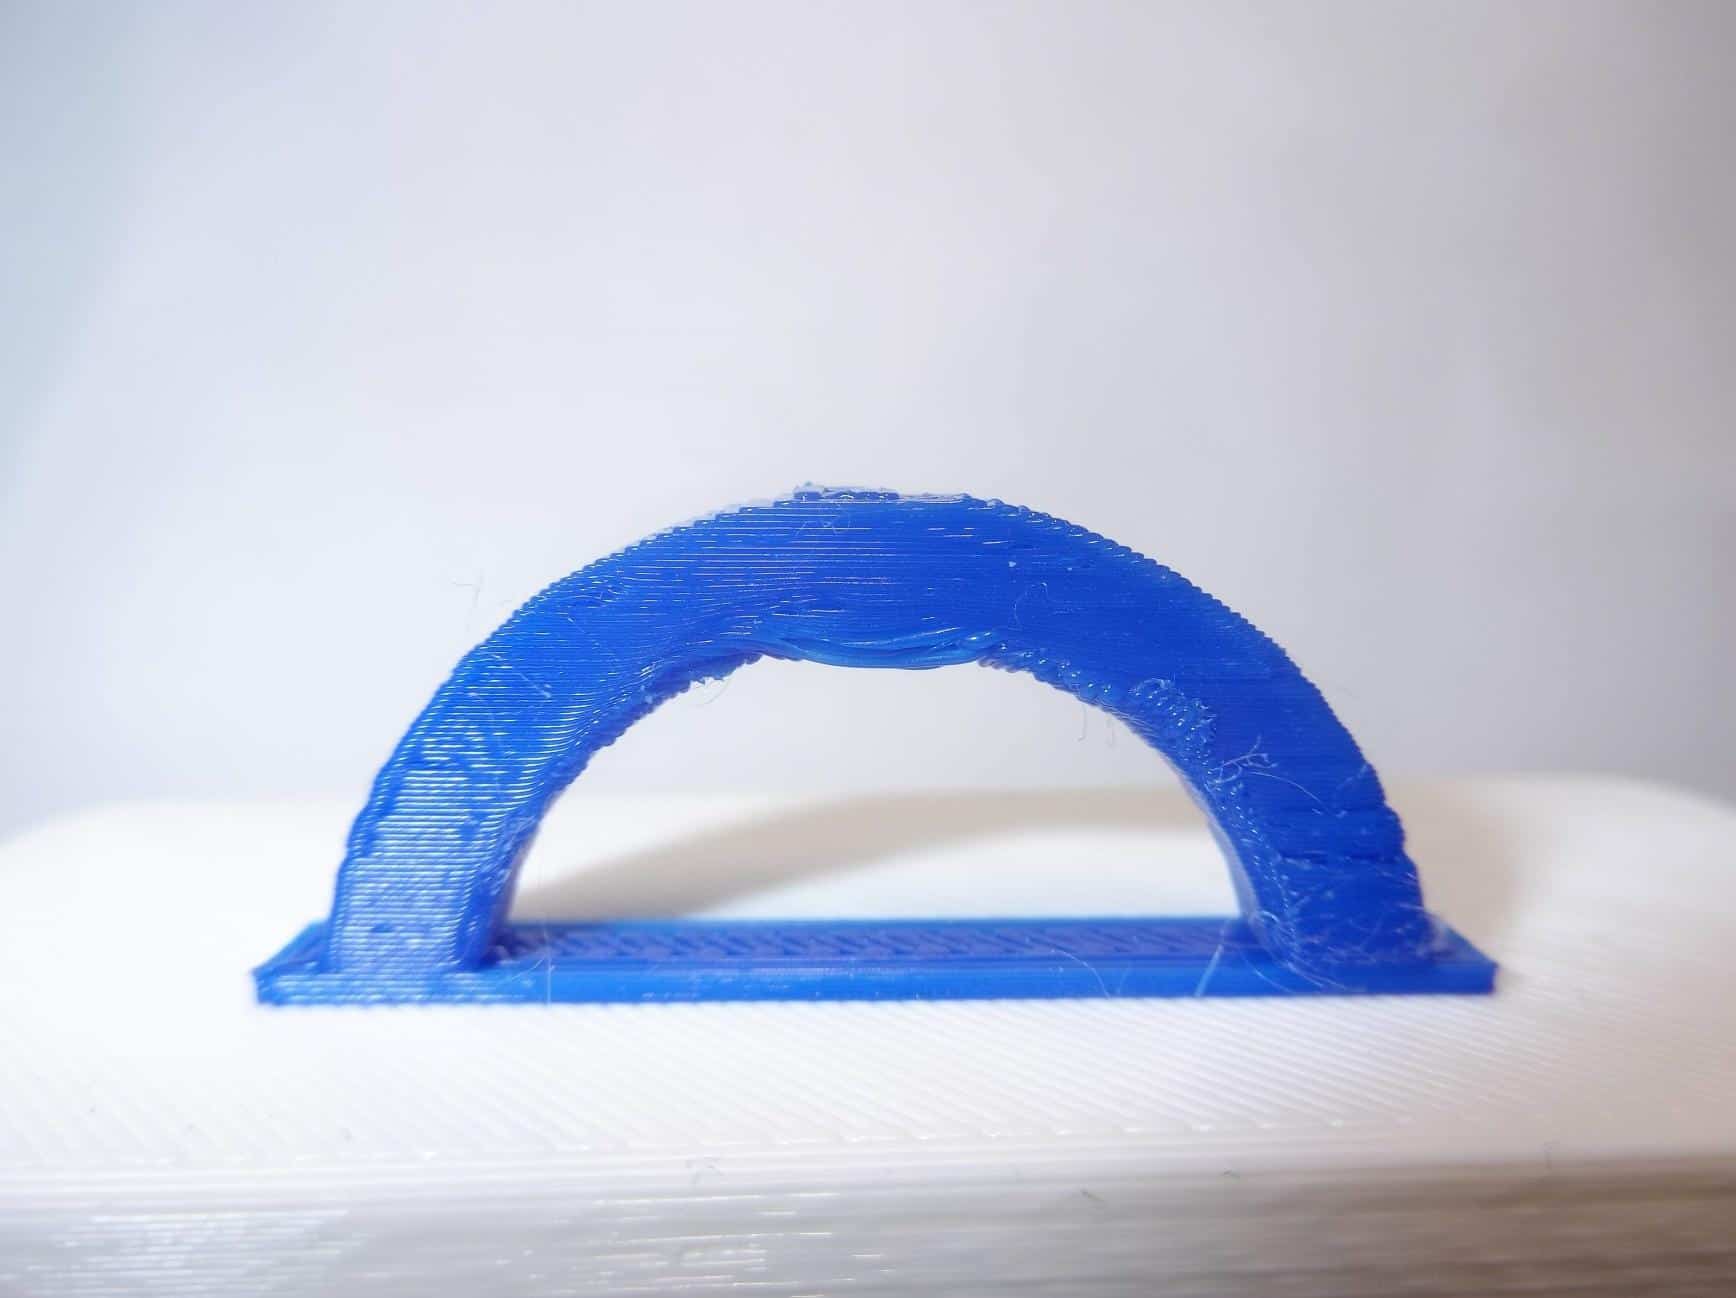
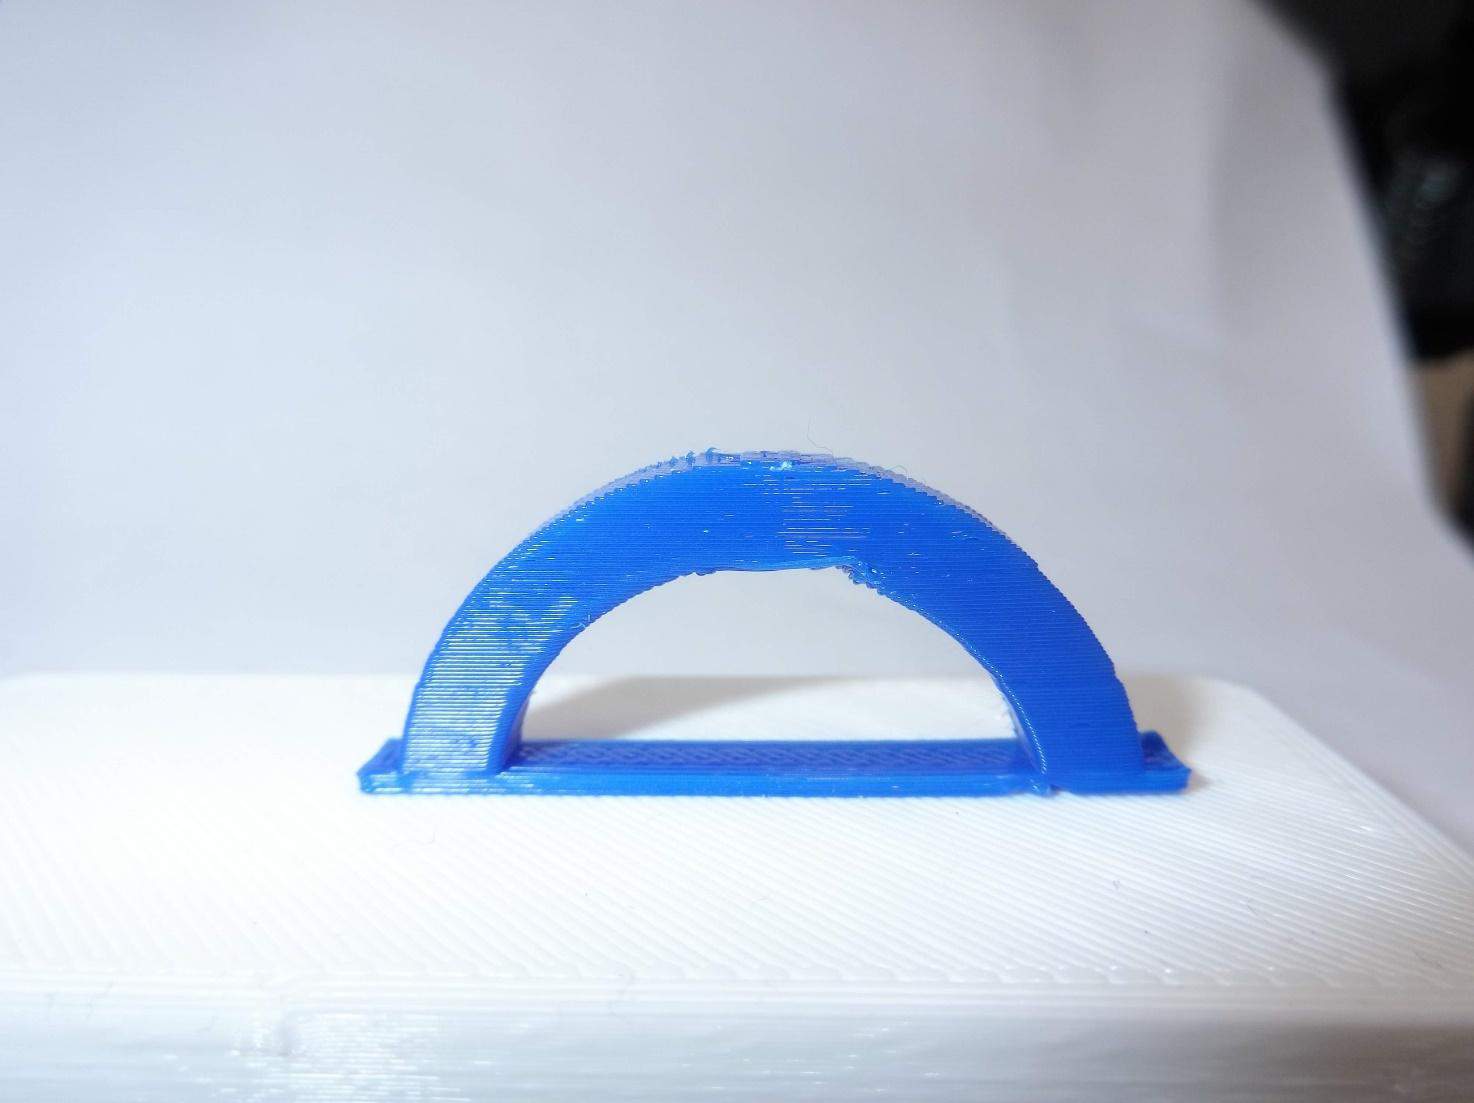
This is most obvious when a print has significant overhangs. Consider the following archway. I printed this using the stock filament cooler on a Monoprice Maker Select Plus:
Identifying issues
This is a small-scale test print (only 40mm wide), but there are multiple quality problems here. First off, the archway is clearly sagging in the center. Then, there is a noticeable distortion starting about halfway up the inner edges. There are uneven layers and a general wavy appearance on the outside edges of the arch.
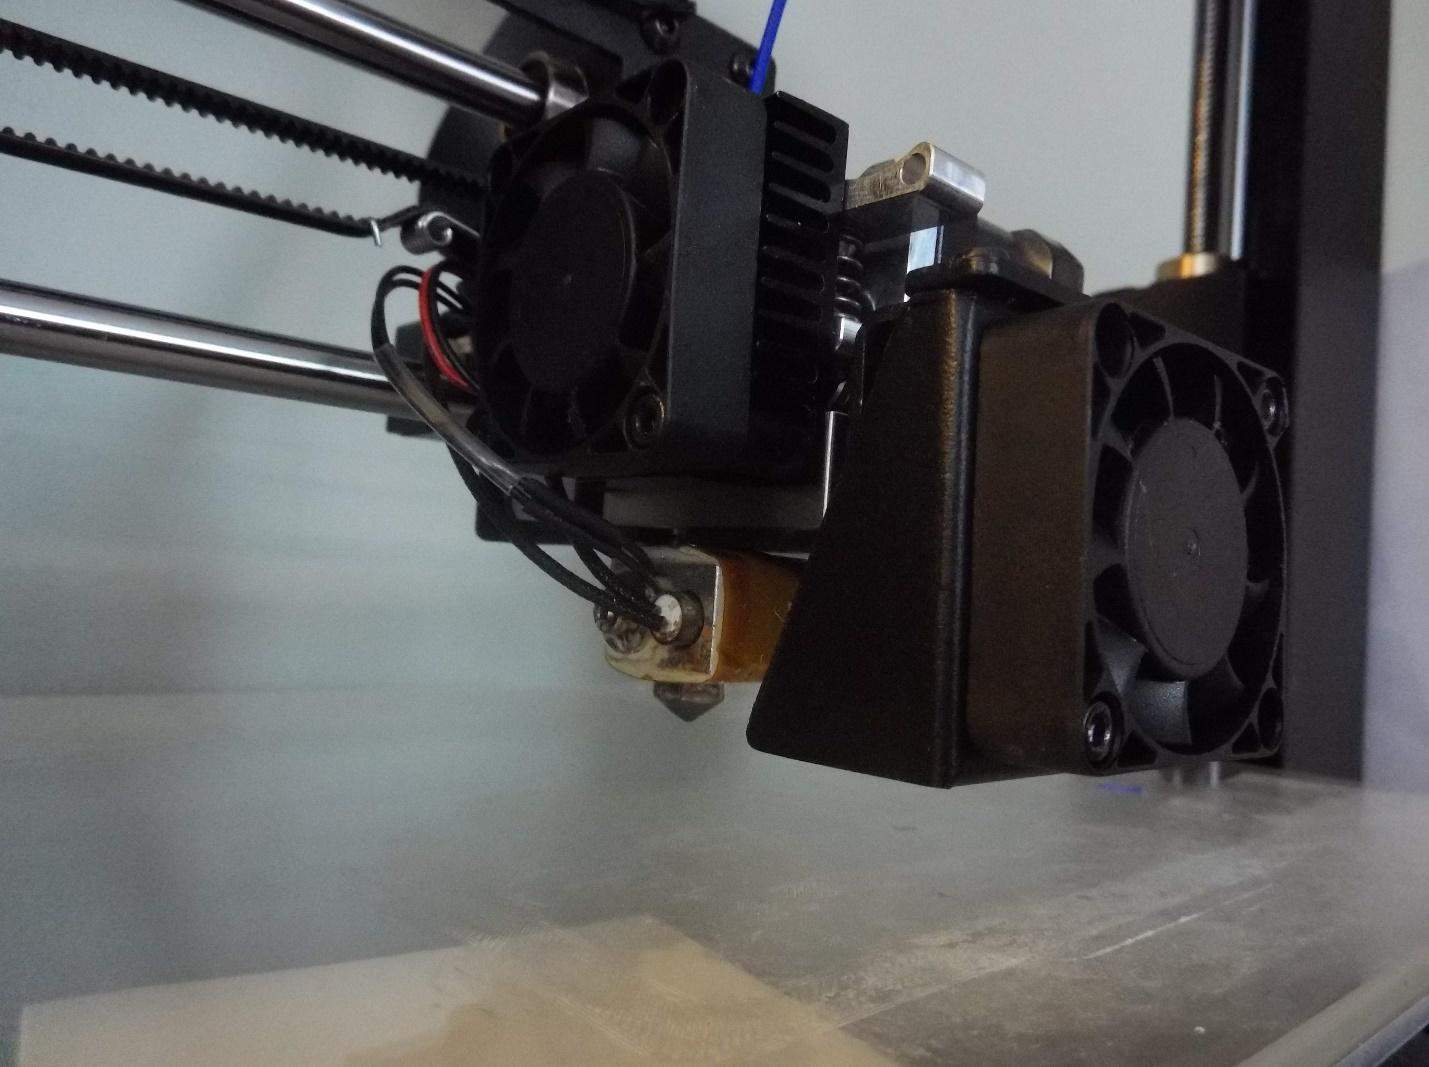
What was going on during the printing process to cause this? The most obvious problem was visible just as the printer was finishing the overhangs:

As the printer was starting to bridge the gap to finish the arch you can see both overhanging sides were curling upward. The right side was curling much more noticeably than the left.
What those issues mean
This is a clear sign of a cooling problem. When the filament cools slowly, differences in temperature can cause it to curl. Since an overhang has no bed or previous layer to stick to, it isn’t able to hold the intended shape.
In the above photo, the curling has been going on for many layers. The printer adds to it every time it passes over and the problem continues to worsen.
In this case, the print was able to finish because the hot end re-melted the still warm plastic as it passed over. On larger prints the curled portion would have cooled more completely before the next pass. The extruder would have hit a solid object, either knocking it off the build plate or damaging the printer.
So why is the filament cooling too slowly?
To answer this question, you have to look at the design of the stock cooler.
What 3D printer am I working with?
The printer I own, the Monoprice Maker Select Plus (also sold as the Wanhao Duplicator i3 Plus) is a terrific value. It’s inexpensive (in 3D printer terms), and arrives almost fully assembled. It can be printing within an hour or two of opening the box. Mine was. That being said, because it is inexpensive, it has some definite design compromises.
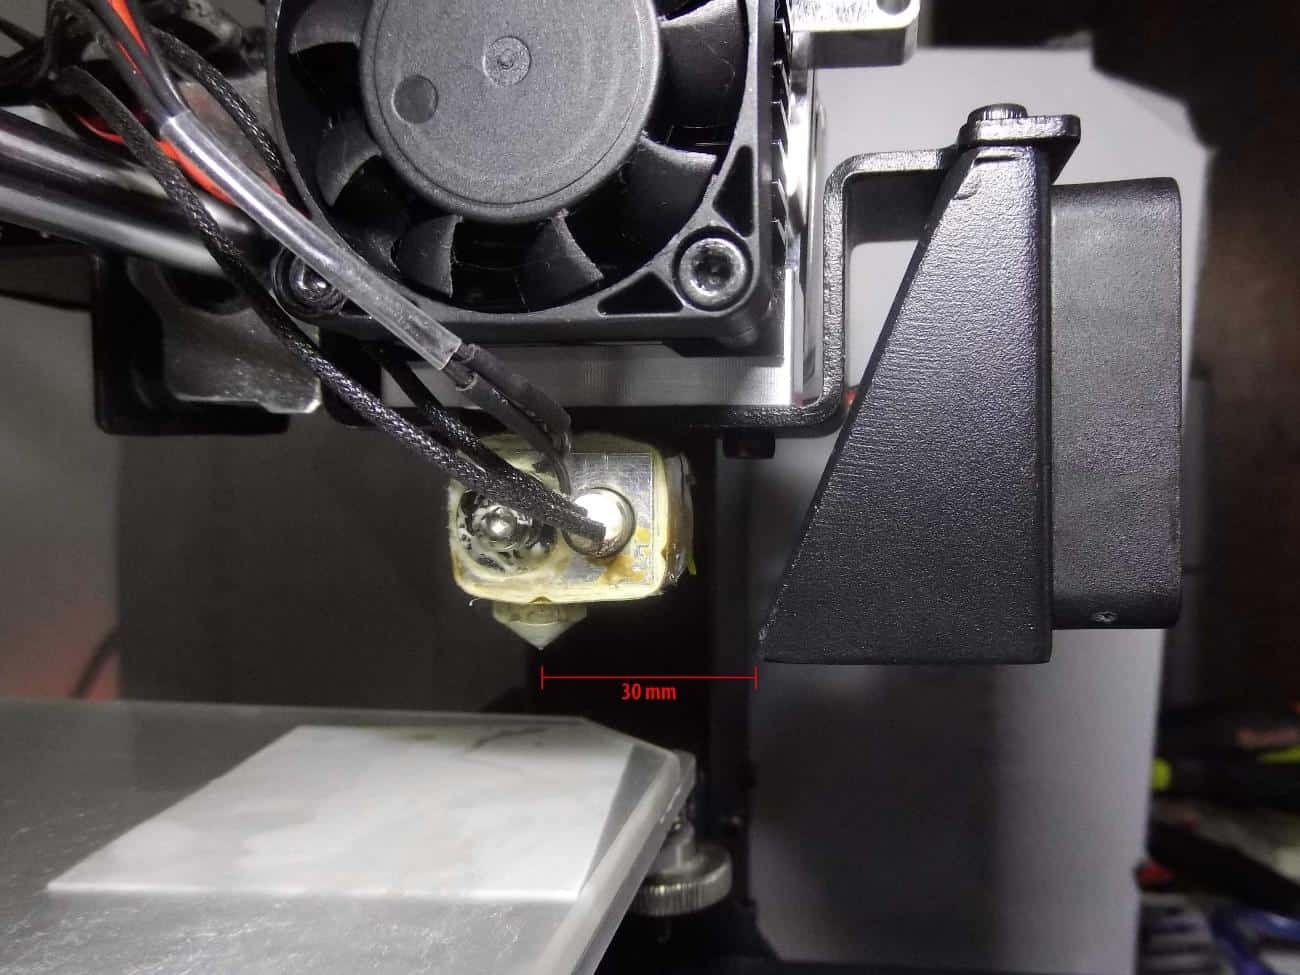
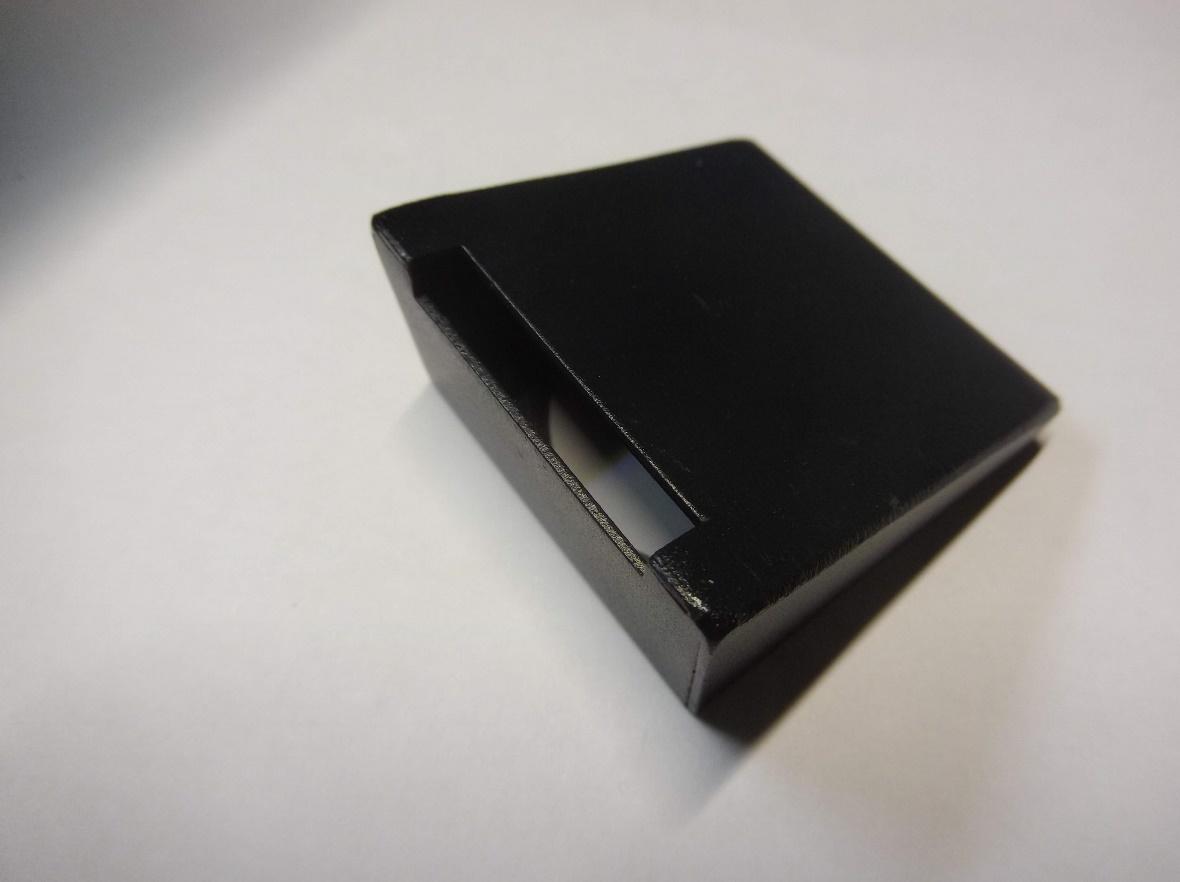
On this model, the stock filament cooler consists of a 40mm 3D printer cooling fan and a stamped steel duct with a roughly triangular profile. This is an inexpensive design but is ineffective at cooling the print.
Here are some of the design flaws I found
There are some problems with the shape of the duct. The most important problem is that it isn’t able to cool the filament directly. The blower assembly is too far away from the hot end, and the simple cutout on the output side of the duct does very little to direct the airflow.
This is why those flaws really matter
With this design, most of the air is blowing down onto the print bed, not the print itself. This will help some to cool the first few layers of a print but is ineffective once it’s more than a few millimeters high. Not only that, this blower inadvertently cools the heated bed. The subsequent uneven surface temperature can cause your object to warp and separate from the bed, resulting in a failed print.
This is my ultimate solution to our cooling fan duct problem
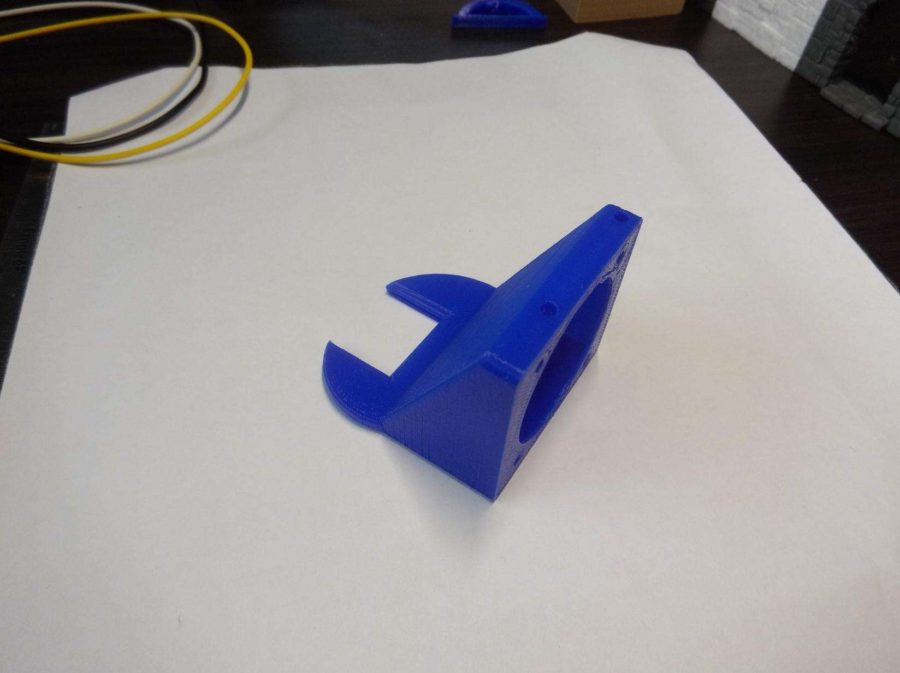
Fortunately, this is where 3D printers really shine. They are one of the only consumer devices capable of producing their own replacement parts. If the cooling duct on your printer isn’t working very well, you can print a new one! The following is the first attempt at a simple replacement:

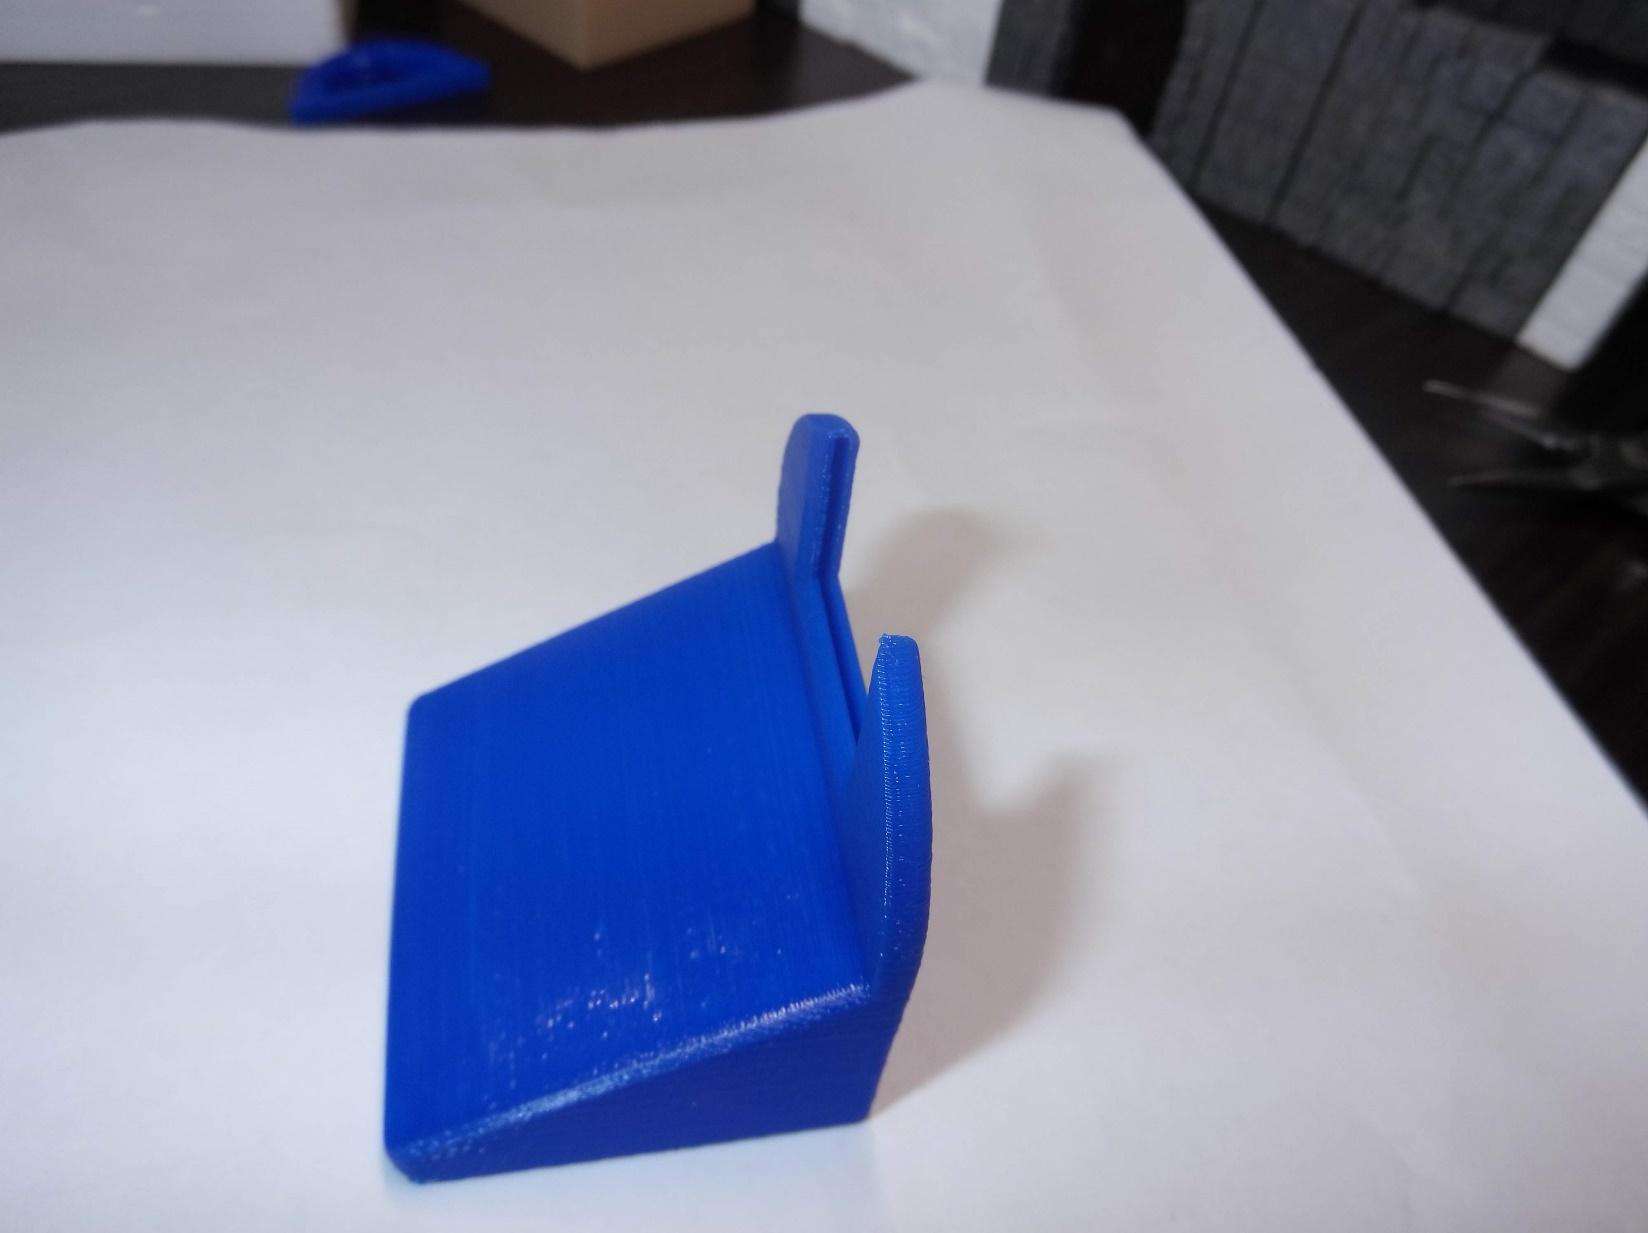
It has the same basic shape as the original but has the top mount points shifted over to better align with the location of the extruder. I replaced the simple cutout with a narrowed, three-sided channel to better direct airflow. It is also less than a quarter of the weight of the original, which will reduce print head whiplash.
It not an overly refined design since I don’t have access to a wind tunnel, but let’s see how it affects the test archway.
Better but not perfect
As you can see, the results are much better than the original. There is significantly less distortion on the edges and at the top of the arch.
I know it’s not perfect. There is still a little sagging and curling visible. The duct design probably does not have enough airflow through the sides to allow for cooling from multiple angles. It’s a decent first attempt, but there is room for improvement.
I will have to make a few changes and try again, but that’s ok. That is another great thing about 3D printers: it’s easy to test out different designs with minimal material cost. You can iterate multiple times and only spend a few cents on plastic and power each time. Plus, if you are printing in PLA it’s mostly biodegradable, so you don’t have to feel bad about covering a landfill with prototypes because you had to make one more small change to your design.
Call me crazy, but I love finding 3D printing problems and solutions. It’s satisfying.
There is always a solution
If you own a hobbyist grade 3D printer or are thinking about buying one, don’t worry if it has some design limitations out of the box. As long as it has the basic functionality you need, you can upgrade everything else can over time, often with parts you create yourself.
You’ll have your own, custom 3D printer by the time I’m done with you. I hope you’re ready for more 3D printer projects for your growing list.
And with that, I have a design to refine!
Do Us a Favor Please
If this page was useful for you just share it with the community. We’ve got solutions for both beginners with our 3D Printing Basics articles, and veterans with our pro tips and guides
Thanks for spending your time with us. Comment below and let us know what you think about this duct, and any other questions you might have about 3D Printing.