
You’re here because you want 3D printer anatomy explained to you in simple terms. Why?
Have you been struggling to understand the ins and outs of 3D printing?
Are you are lost in all the jargon?
Are you worried you don’t understand enough about 3D printing to make informed decisions
Are you afraid of the learning curve?
Do you fear you’ll mess something up the first time you try to troubleshoot your 3D printer?
If any of that describes you then this article is just for you. Here’s why…
I was you. Before I spent time researching. That’s why I originally gathered the information I’m about to share with you.
I didn’t do it because I’m an altruist, I had selfish motives, but now you get to benefit from my hard work.
I’m going to give you an amazing look at what really makes your 3D printer work.
This article comes packed full of images and descriptions to completely demystify these magical machines.
Get ready to embrace knowledge, my friend.
…We’re going on a deep dive.
What are we Really Looking At
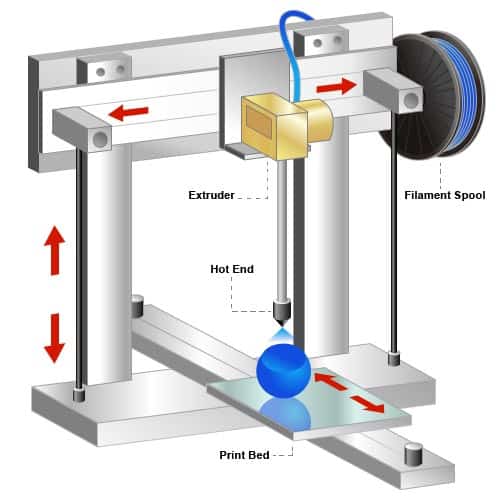
There are a number of types of 3D printers, and many of these parts I will describe are on these different types, but not all. What I am outlining below is an FFF/FDM Cartesian 3D Printer.
Note: If you want to know why I call it FFF/FDM check out this article. If you want to know some of the different types of 3D Printers check out this article.
Extruder
First of all let’s start with the heart of the 3D printer, the extruder. This is where the magic happens. There are two major sections to the extruder, the cold end, and the hot end. The cold end pulls filament from the print spooler and pushes it into the hot end where the hot end heats and melts it before pushing it out of a nozzle at precision levels measured in microns.
There are two primary types of extruders. They are the Bowden extruder and the Direct extruder. The direct extruder has the cold and hot ends directly next to one another, and the Bowden provides more space. There are some distinct advantages and disadvantages for each of these, consequently getting into those is for this Bowden Extruder vs DIrect Extruder article where I give them the attention they deserve.
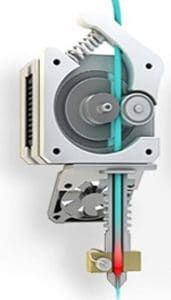
Cold End
The cold end is where the filament enters the extruder. It consists of a stepper motor, hobbed gear, and idler gear.
Stepper Motor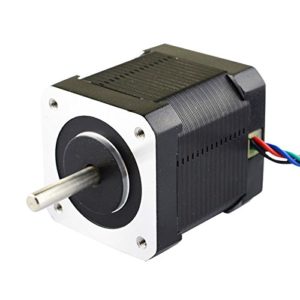 3D printers use stepper motors in a variety of places. When given power regular motors run continuously. Stepper motors; however, move in increments. The incremental movement of a stepper motor gives it much more precision, and that precision counted in increments per revolution.
Hobbed Gear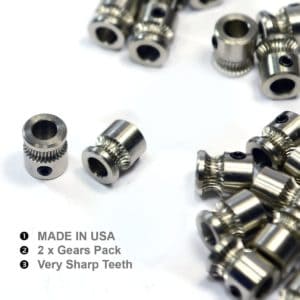 This gear is part of the cold end. It has grooves that bite into the filament to allow the gear to push the filament forward.
Idler Gear This gear is mounted with the hobbed gear. It is spring loaded and presses the filament into the hobbed gear thus gripping the filament. This gear is usually adjustable so the tension on the filament can be increased or decreased depending on the desired result.
Hot End
As previously discussed the hot end heats the filament to melt it in order to extrude it in a controlled manner. It can either have PEEK/PTFE insulators or be all metal. The all metal construction allows for manipulation of a wider range of materials in a more controlled manner, but it does require active cooling.
Heat Sink and/or Cooling Fan
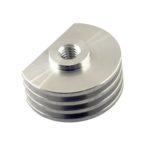
The filament is first fed through the Heat Sink. This critical piece of equipment prevents the heat from creeping back up the filament and prematurely creating a melted plastic mess.
Heat Break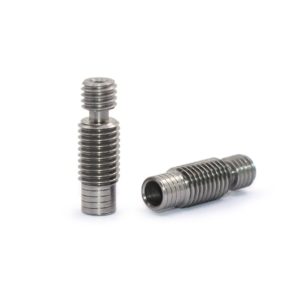 Additional threaded element to help prevent heat from traveling up the filament. It threads into the heat sink and the heating block.
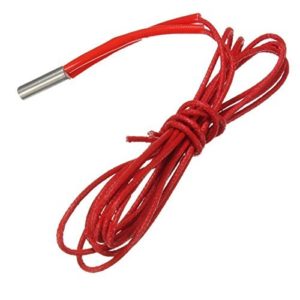
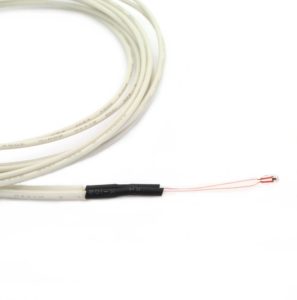
Heater Block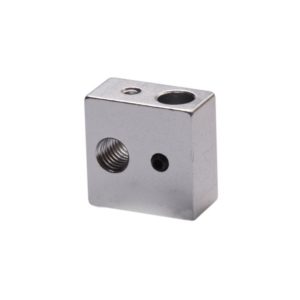
This metal block holds the heater cartridge and the thermistor, and the nozzle is screwed into it.
- Heater Cartridge – This is an element that heats up the heater block to heat melt the filament.
- Thermistor – Electronically measures the heat of the heater block.
Nozzle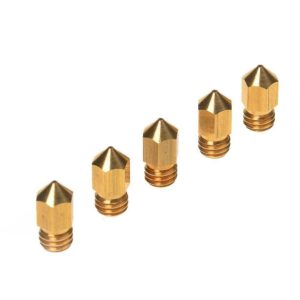
The nozzle is where the melted filament finally pushes out to become your awesome 3D print. This is an interchangeable part, and the size of the opening will affect your print resolution. Most 3D printers come with a stock 0.4 mm nozzle. (This is also where a considerable number of problems occur with your printer. You will become used to unclogging this piece. Any 3D maker will agree.)
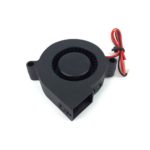
Layer Cooling Fan
This fan cools you the plastic immediately after the extruder lays it down. Its operation is controlled by your software to achieve varying results.
Print Bed
Your 3D printer prints the object on the print bed. Print beds are usually glass. Common add ons to the print bed are heating elements and a print surface that allows models to stick better.
- Most high-end 3D printers capable of printing a majority of filament types will be heated, but many printers, particularly on the lower end, do come without a heating element. Print beds are heated to prevent your model from warping. Rapid cooling of the hot melted filament causes warping.
- When 3D printing the adhesion of the first layer to the print bed is extremely important and can mean the difference between a perfect print and a disaster. As you can imagine a large range of 3D print bed surfaces are on the market. These can be anything from painter’s tape to specialized print surfaces designed for 3D printing.
Movement
Cartesian 3D printers move the print bed, and the print head in order to print in all three dimensions. This motion is achieved by using stepper motors as mentioned previously.
Z Axis
To move in this direction the printer bed moves.
Threaded Rod / Lead Screw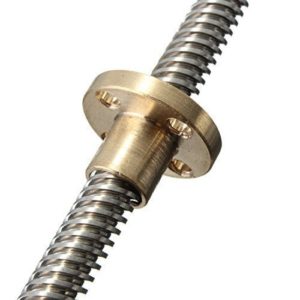
Threaded rods and lead screws are metal bars with threads on them that attach to a stepper motor. When the motor runs it spins the bar and a nut attached to the print bed moves along its length. As the bar spins and the nut moves the assembly will move either forward or back, depending on the instruction. The difference between threaded rods and leads screws is in the quality of construction and precision. Generally, lead screws are more precise and higher quality. This seems like something I will write more on that at a different time.
X and Y Axis
The Extruder/Print Head moves to achieve X and Y positioning.
Guide Rods
The print head sits on guide rods and slides along them to get into position.
Belts and Gears
Depending on the setup a series of gears, stepper motors, and belts pull the printer head side to side, and up and down.
Electrical Components
In today’s world, mechanical bits rarely do any work without the direction of a number of electrical ones. Since 3D printers need to be incredibly precise the need for good components is doubly important.
Power Supply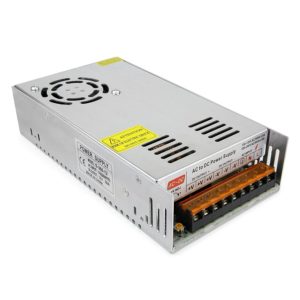
This is the component that takes the 120V AC current coming into your wall and converts it to a more useful low voltage DC power for your 3D printer. The typical power supply is an ATX power supply, like those used in your ordinary desktop computer. 3D printers generally use either 12V or 24V systems. Because mixing voltages can cause serious damage you will want to ensure you know what system your printer has before troubleshooting it.
Motherboard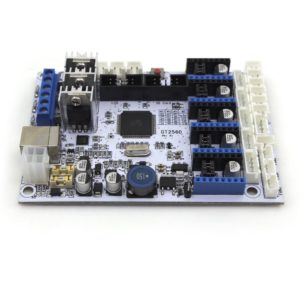
Just like during childhood, the motherboard runs everything. 3D printers can be incredibly diverse, therefore there are a large variety of motherboards that come with different options. That’s a different article for another day. Suffice to say the motherboard takes the signals from your computer and turns them into reality on your 3D printer.
Stepper Drivers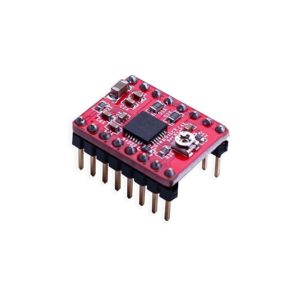
Stepper drivers are chips either integrated into or plugged into, the motherboard. These drivers operate the stepper motors, and if you get really in depth can be used to digitally divide up the increments giving even more precise control. This type of control requires some skill and is often used to correct problems like motors overheating, or skipping.
User Interface
A user interface is simply how you tell your 3D printer what you want it to do and it can be onboard, or it can be your computer.
Connection
Because your printer isn’t omniscient and all powerful it needs to have some way to get instructions. 3D printers have a variety of ways to communicate. You can have SD card slots, USB ports, or even Wi-Fi on some printers.
Other Important Parts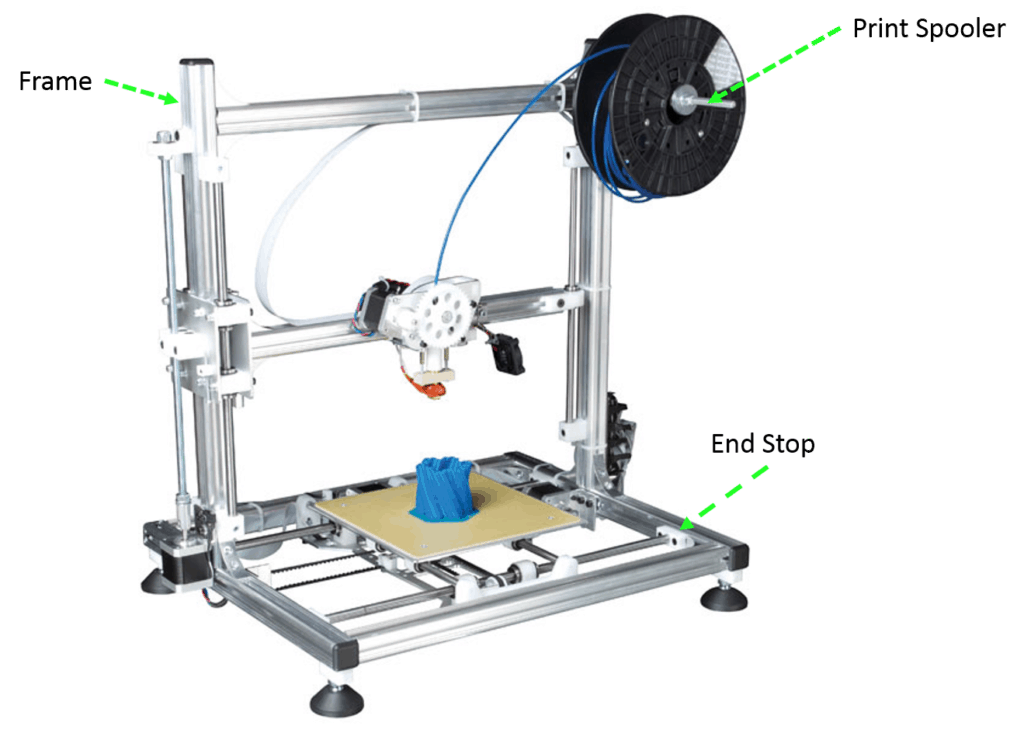
Frame
The frame is the body that holds all of the crucial elements together. It can be made out of a variety of materials. The material used often directly correlates to the precision of your 3D printer because the more rigid the frame is the less excess movement at the print head level.
End Stops
The printer uses End Stops on each axis to calibrate the machine. The end stops can be mechanical or optical, and they simply tell the printer when it has reached a known position.
Print Spooler
Filament comes on spools from the manufacturers. As a result, we load filament spools on the print spooler where it will spin while filament feeds into the printer.
Bed Leveling
Without leveling a print job will not turn out correctly consequently you will need to level the bed of your printer. Many printers on the cheaper end require you to do it manually while others give you auto-leveling. If you have to do it manually it will need to be checked periodically as it will move over time.
Enclosure
Some 3D printers have enclosures for your protection. If your 3D printer doesn’t have one you may want to consider one if safety is a concern of yours.
Filament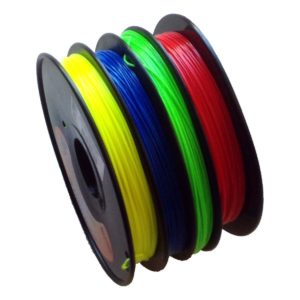
Finally, we’ll cover filament. While not technically a part of your 3D printer, this is an integral part of 3D printing hence we will briefly mention it here.
3D printers melt plastic called filament that comes on a roll to create the stunning models we all know and love. Filament comes in a variety of options.
- First, it comes in two common sizes, 1.75mm and 3 mm, but 1.75mm is by far the most common.
- Next, you need to consider filament type. Two of the most common you will see are PLA and ABS, but there are more like TPU and Polysmooth.
- From here the discussion gets into color, brand, and whether or not the filament is exotic. (Exotic can even include wood and metal elements to create some interesting looks)
I’ve already written about the best PLA filament brands over in this article.
Where to Now?
Now that you know more about 3D printers you are far better armed to make the right decision when selecting the right printer for you. That depends. If you’re interested in researching the right 3D printer for you then click on this link to see a review of some inexpensive plug and play 3D Printers under $400.
If you already have a 3D printer, don’t go anywhere. Check out my other articles listed on the side of the page. This is a resource for beginners and makers alike.